by Baxter
If you have been around the yoga classroom for any reasonable amount of time, you have likely heard of the psoas muscle. But you may not have a good idea of where it is or what it does! You should though, as your daily activities—or inactivity if you are sitting a lot during the day—can actually create a short, tight psoas muscle that could use a bit of lengthening. So today I’ll introduce you to your psoas muscle in a deeper way than can sometimes take place in the yoga classroom, inform you of some of its roles in posture and movement and suggest a few ways to lengthen it, if it is on the tighter side of life.
The only other time I could find on the blog that we had talked about the psoas muscle was way back in January of 2012 (I Think I Have Sciatica), where we first introduced this drawing of the lower torso and pelvis which shows nicely the psoas muscle seen here with everything except the skeleton and select muscle removed.
The psoas is said to originate from the sides of the lumber vertebrae, possibly even starting as high up as thoracic 12 (T12), so it has multiple spots on the side of the spine where it attaches. It then travels downward, close to the midline of the pelvis, just in front of the sacrum and ileum, until it heads slightly lateral and anterior, so it can leave the pelvis by sliding right over the lateral pubic bone and just behind the inguinal ligament in order to dive down and laterally attach to the upper inside of the femur bone (at a bony bump known as the lesser trochanter of the femur). Now we can actually feel the greater trochanter with our hands, just about six inches below the side of our pelvic rim, but the lesser bump is not accessible - due to lots of muscles which make touching it almost impossible. And due to the fact that the psoas lies deep within the pelvis, it can be challenging to feel it - both literally and perceptually.
Hopefully, with the help of the picture and my written description, you are starting to get oriented to where the psoas is. But what does this muscle do when it contracts and shortens? It depends a bit on which part of the set-up is stabilized and which part is free to move. And it also depends on whether it is working in concert with other muscles to help you walk (for instance), or to help you maintain upright posture when you are standing still.
Let’s look at it working alone first. If the spinal origins of the psoas are stable and not moving, the psoas is said to have the following effect on the femur bone (to which it attaches): it flexes the femur toward the belly, pulling it slightly medially toward the pubic symphysis, and rolls the thigh bone externally on its axis. If we wanted to take the femur bone in the opposite direction as a way of stretching it, we’d need to take it backward towards the buttocks, swing it slightly out to the side and internally rotate it. Doing a modified Locust pose (Salabasana), with the legs apart a bit and an emphasis on rolling the thighbones in would be an example of a pose that could lengthen the psoas.
When we stabilize the femur, as when you are sitting in a chair, and contract the psoas, the origin gets pulled forward and down, encouraging the forward folding action known as flexion of the lumbar spine. We use this action whenever we bend over to pick something up off the floor. The psoas also works in concert with several other spinal muscles to encourage the upward lift of the spine that we cultivate in poses like Mountains pose. In that setting, it does not create excessive lumber flexion, but does allow the natural curve in the lumber area to be present. So that is a bit about what the muscle does (realizing that the psoas works with other muscles that flex the femur bone, such as part of the quadriceps).
When the psoas is overly tight and short, it can affect the lower back in a negative way (contributing to back pain), influence the ease of a neutral pelvic tilt and affect gait. There are passive ways to release tension in the psoas and more active ways to lengthen and stretch the psoas.
In The Psoas Book, author Liz Koch recommends “releasing” tension in the psoas by lying in Constructive Rest position (on your back, with your knees bent and the soles of your feet on the floor), with your feet about 1-2 feet from your hips, and staying there for a while (maybe 5-10 minutes) with close attention to sensations in the area of the back belly and hip joints, as you attempt to sense the releasing of tension in those areas. Another version of Constructive Rest involves having your calves on a support, like our Easy Inverted pose (see Easy Inverted Pose). Once you get better at sensing release in tension in this area, slowly move one foot further away from the hips without letting the pelvis tip or tuck and stop when tension is encountered in the areas you are observing. Gradually moving that foot until the leg is straight, if you can do so without changing the pelvic alignment. A more advanced variation involves folding one leg into the chest (in an upside-down Pigeon pose), without tipping or tucking your pelvis, and then again slowly extending the other leg long on the floor (it’s the lengthening leg that will stretch that side's psoas).
In my regular classes, I often take advantage of the back leg position in Warrior 1 to bring attention to the psoas of the back leg, as it needs to lengthen in order to keep the pelvis neutral (not going into dramatic anteversion or forward tip). From there, doing drop knee lunges, both with the hands on the floor next to the feet for an easier version, but gradually coming up higher, with hands on blocks, and finally with hands on the front thigh, while letting the hips and torso move a bit forward while keeping the pelvis stable, are great ways to lengthen the psoas. The back leg in upright Pigeon pose also gives a good stretch to the psoas.
This list of ways to work with your psoas is by no means complete. You might look at Mary Pullig Shaztz, MD’s book Back Care Basics for her approach to psoas stretching in the face of back pain. And Jean Couch’s classic The Runners Yoga Book is sure to have a few suggestions as well. And if our readers have any favorites, please write a comment back to us! Happy stretching!
Showing posts with label Baxter Bell. Show all posts
Tuesday, September 10, 2013
Thursday, September 5, 2013
Yoga After Cataract Surgery
by Baxter
A teacher wrote in to ask us about a student who will be having cataract surgery. The teacher said that the student's doctor told her she should avoid lifting for two weeks, and asked us: Are there any yoga poses that should be avoided? Inversions come to mind but does that mean downward dog as well? Because cataract surgery is one of the most common surgeries performed in the US each year, many of us will have students in this very situation, and some us will find ourselves there as well. So I decided to do a full post on the topic.
It is estimated that 50% of adults over the age of 80 have a cataract. Cataract is a clouding of the lens of the eye that lies just behind your pupil and iris, the front and center most parts of your eyeball. The lens allows light and images to pass through to the back of eye onto the retina, which is the part of the eye that sends that image info to the brain. The clearer the lens, the better the image. The lens also focuses the images onto the retina, not unlike the focus feature on a slide projector or movie projector.
What causes the clouding of the lens that we call a “cataract”? The lens is made up of mostly water and proteins. As we get older, some of the proteins begin to clump together. If the clumps get big enough, they begin to partially block the light trying to pass through the lens. As long as the clumps stay small, you may not even notice the changes, but if a clump gets big enough, your vision will start to get blurry or even color tinted, usually brownish. Even though cataracts are sometimes referred to as “age-related” and I mentioned the percentage of elderly with them, you can sometimes develop cataracts in your 40s or 50s, and there are even rare forms of congenital cataracts that infants can be born with. You are at increased risk for developing one if you have prolonged exposure to sunlight, smoke cigarettes, drink alcohol, or have diabetes.
The good news is that treating cataracts with surgery is quite safe in general. However, during the post-surgery period, there are risks of developing problems such as bleeding, infection, or changes in the pressure inside the eye, either up or down. And there is a very slight increase in the chance of the retina at the back of the eye coming away from inside surface of the eye, a condition known as retinal detachment. This last complication is considered a medical emergency as it can lead to sudden loss of vision. To learn more about cataracts in general, check out this National Institutes of Health-sponsored web page Facts About Cataracts.
On the NIH web page, I found the following recommendations for modified activity after cataract surgery, but without specific connection to the above risks:
“When you are home, try not to bend from the waist to pick up objects on the floor. Do not lift any heavy objects. You can walk, climb stairs, and do light household chores.”
I can only assume that these recommendations are made to reduce the risk of bleeding, pressure changes in the eye (which can be position- and exertion-influenced) and retinal detachment. So, how should you modify this student’s yoga practice during the two-week post-operative period, and maybe for a full eight weeks, the typical time for the surgery to completely heal up?
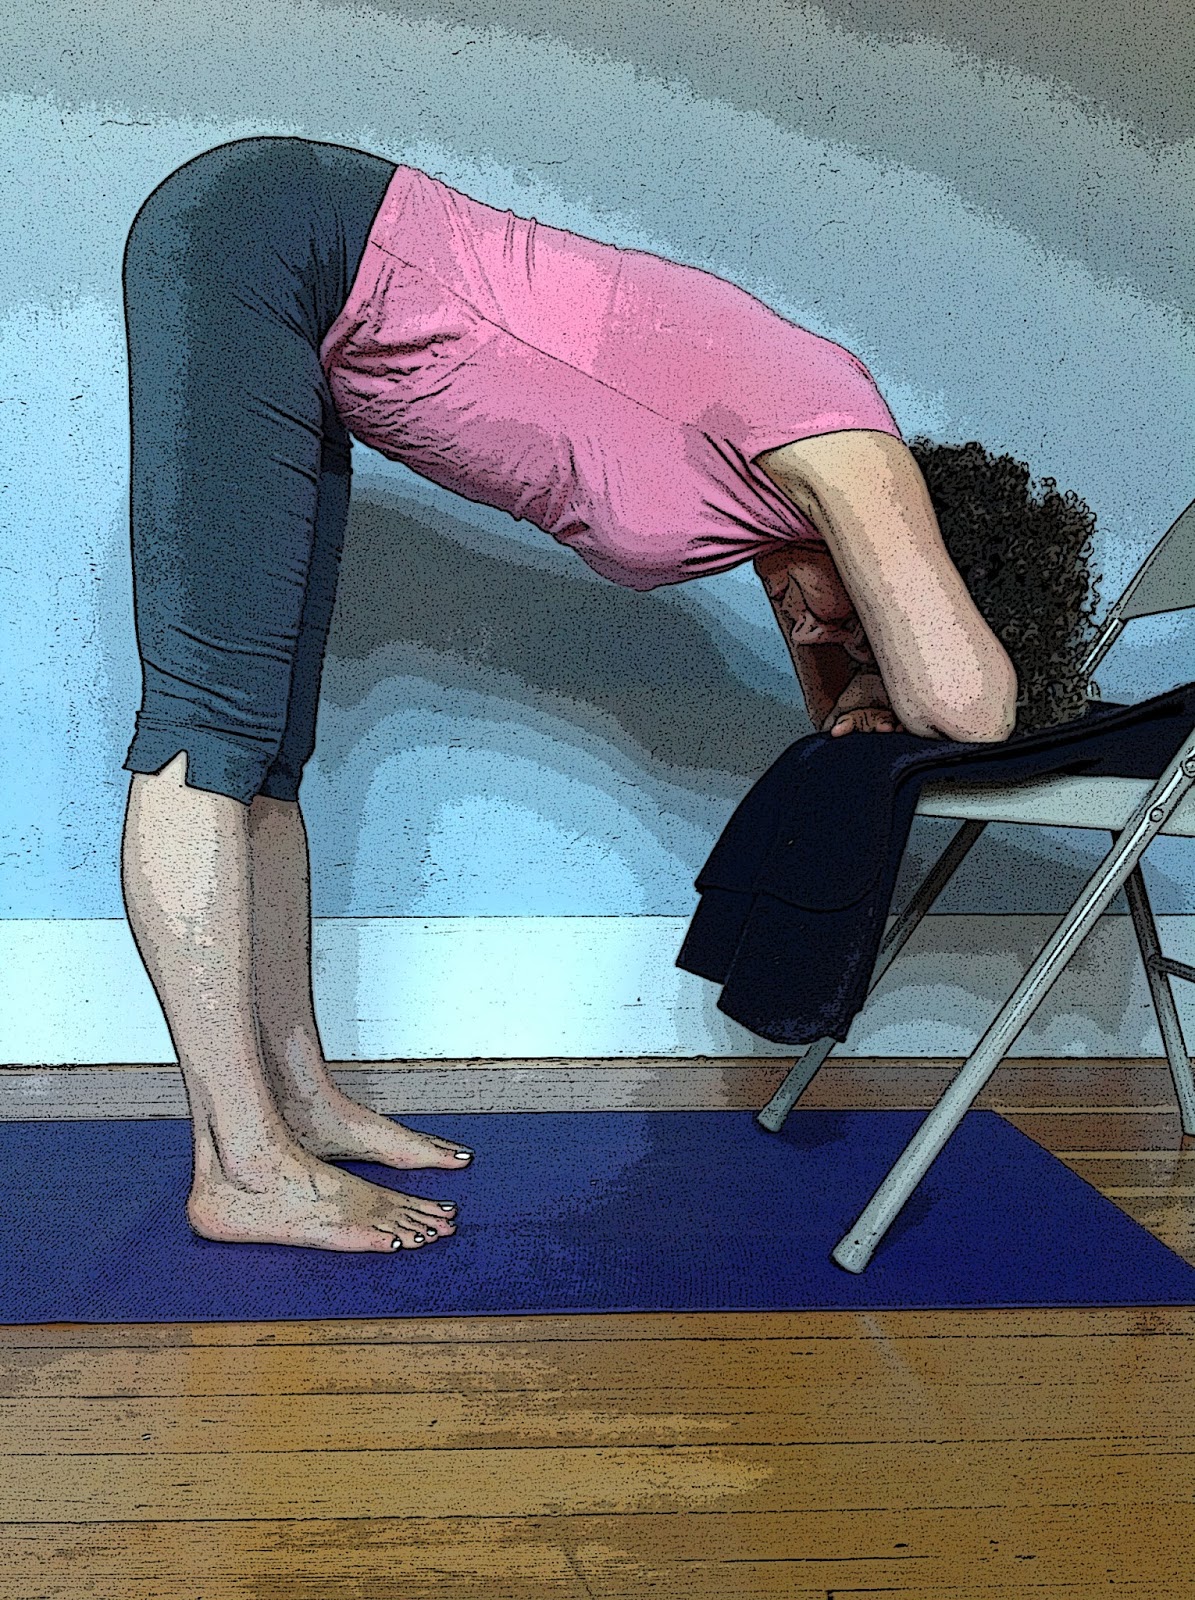
Inversions should certainly be avoided. This includes standing forward bends like Uttanasana and Prasarita Padottanasana, and even Downward-Facing Dog. You can still include modified poses like Half Dog pose at the wall. If you apply the rule of not bending past 90 degrees from vertical, you will minimize the pressure increase to the head and subsequently to the eye. As far as I know, there has not been a specific study to confirm eye pressure changes doing inverted yoga postures, but it seems likely that they would potentially cause it and are therefore best avoided. Also, as I think I have mentioned before regarding yoga and high blood pressure, you also need to limit the length of time you stay in a static or held pose, especially the standing poses, as the exertion required often leads to an overall increase in blood pressure, which could also influence pressures in the eyes. Other rather obvious poses that could have a similar effect are those that require strong, sustained contraction of the abdominal muscles, which would also increase blood pressure in the eyes. Poses like Boat pose (Navasana), deep held twists (even sitting versions), and arm balances like Crow pose (Bakasana) also fall into this category.
In a time of healing—for cataract surgery or any other health recovery time—you want to keep the nervous system quieter, spending more time in the “rest and digest” part of the autonomic nervous system. So spend this two week healing period doing gentler practices, including lots of supported restoratives and guided meditations on health and healing. It would be great to hear back from the person who sent in the question on how things turn out for your student, and from any of our readers who have worked with this situation before.
A teacher wrote in to ask us about a student who will be having cataract surgery. The teacher said that the student's doctor told her she should avoid lifting for two weeks, and asked us: Are there any yoga poses that should be avoided? Inversions come to mind but does that mean downward dog as well? Because cataract surgery is one of the most common surgeries performed in the US each year, many of us will have students in this very situation, and some us will find ourselves there as well. So I decided to do a full post on the topic.
It is estimated that 50% of adults over the age of 80 have a cataract. Cataract is a clouding of the lens of the eye that lies just behind your pupil and iris, the front and center most parts of your eyeball. The lens allows light and images to pass through to the back of eye onto the retina, which is the part of the eye that sends that image info to the brain. The clearer the lens, the better the image. The lens also focuses the images onto the retina, not unlike the focus feature on a slide projector or movie projector.
What causes the clouding of the lens that we call a “cataract”? The lens is made up of mostly water and proteins. As we get older, some of the proteins begin to clump together. If the clumps get big enough, they begin to partially block the light trying to pass through the lens. As long as the clumps stay small, you may not even notice the changes, but if a clump gets big enough, your vision will start to get blurry or even color tinted, usually brownish. Even though cataracts are sometimes referred to as “age-related” and I mentioned the percentage of elderly with them, you can sometimes develop cataracts in your 40s or 50s, and there are even rare forms of congenital cataracts that infants can be born with. You are at increased risk for developing one if you have prolonged exposure to sunlight, smoke cigarettes, drink alcohol, or have diabetes.
The good news is that treating cataracts with surgery is quite safe in general. However, during the post-surgery period, there are risks of developing problems such as bleeding, infection, or changes in the pressure inside the eye, either up or down. And there is a very slight increase in the chance of the retina at the back of the eye coming away from inside surface of the eye, a condition known as retinal detachment. This last complication is considered a medical emergency as it can lead to sudden loss of vision. To learn more about cataracts in general, check out this National Institutes of Health-sponsored web page Facts About Cataracts.
On the NIH web page, I found the following recommendations for modified activity after cataract surgery, but without specific connection to the above risks:
“When you are home, try not to bend from the waist to pick up objects on the floor. Do not lift any heavy objects. You can walk, climb stairs, and do light household chores.”
I can only assume that these recommendations are made to reduce the risk of bleeding, pressure changes in the eye (which can be position- and exertion-influenced) and retinal detachment. So, how should you modify this student’s yoga practice during the two-week post-operative period, and maybe for a full eight weeks, the typical time for the surgery to completely heal up?
Inversions should certainly be avoided. This includes standing forward bends like Uttanasana and Prasarita Padottanasana, and even Downward-Facing Dog. You can still include modified poses like Half Dog pose at the wall. If you apply the rule of not bending past 90 degrees from vertical, you will minimize the pressure increase to the head and subsequently to the eye. As far as I know, there has not been a specific study to confirm eye pressure changes doing inverted yoga postures, but it seems likely that they would potentially cause it and are therefore best avoided. Also, as I think I have mentioned before regarding yoga and high blood pressure, you also need to limit the length of time you stay in a static or held pose, especially the standing poses, as the exertion required often leads to an overall increase in blood pressure, which could also influence pressures in the eyes. Other rather obvious poses that could have a similar effect are those that require strong, sustained contraction of the abdominal muscles, which would also increase blood pressure in the eyes. Poses like Boat pose (Navasana), deep held twists (even sitting versions), and arm balances like Crow pose (Bakasana) also fall into this category.
In a time of healing—for cataract surgery or any other health recovery time—you want to keep the nervous system quieter, spending more time in the “rest and digest” part of the autonomic nervous system. So spend this two week healing period doing gentler practices, including lots of supported restoratives and guided meditations on health and healing. It would be great to hear back from the person who sent in the question on how things turn out for your student, and from any of our readers who have worked with this situation before.
Tuesday, August 27, 2013
Nocturnal Leg Cramps and Yoga
by Baxter
Recently while reading through one of my Family Medicine journals, I came across an article that caught my interest due to the frequent complaints of some of my students. It was on nocturnal leg cramps. Yes, quite often my students will ask me what they can do to address these ill-timed leg cramps (as if there is any good time for a leg cramp!). I’ll get into what we know about the nocturnal leg cramps (NLCs) in a minute, but what caught my eye in reading was the recommendation for treatment:
“Limited evidence supports treating NLCs with exercise and stretching…”
Now, they don’t specify yoga, but as we all know by now, modern yoga would fit the bill. This treatment was recommended before any mention of medications, which is quite unusual for these journal articles. It is usually the other way around—meds first, non-drug options mentioned last. This gave me a great sense of hope that modern medicine is beginning to grasp the benefit of starting with non-drug treatments for some conditions!
So what are these NLCs and how common are they? Well, according to the American Academy of Family Practice, they are super common, with up to 60% of adults reporting they get these kind of leg cramps. They are described as recurrent, painful tightening of muscles in the legs, usually the calf muscles. And the NLCs can contribute significantly to insomnia. The exact cause in not known, but they hypothesize that the cramps are probably caused by muscle fatigue or nerve dysfunction, as opposed to low levels of blood electrolytes like sodium, potassium and such, or from other abnormalities.
Just to flesh out the symptoms of NLCs, they are painful and incapacitating, like no walking while they are occurring! They last an average of nine minutes per episode, and the first bout can be followed by hours of recurrent episodes and residual pain. Even though the calf is the most common muscle affected, cramps in the feet and thighs are also fairly common. Sufferers describe them as a spasm, tightening, twinge, strain, or a muscle seizure. And they are usually in one leg, and can cause the limb to move.
Folks with other conditions are sometimes more likely to have NLCs, such as those with vascular diseases, lumbar canal stenosis (narrowing of the spinal cord channel in the lower back), cirrhosis of the liver, patients on hemodialysis, and those who are pregnant, to name a few. Certain medications are also associated with NLCs, such as estrogen, Naprosyn and others. So, definitely check that out with your family MD if you start having them. NLCs are different from other conditions that might seem similar, like restless leg syndrome, claudication (cramps due to vascular narrowing of blood vessels in legs that occur with walking), myositis (muscle inflammation), and peripheral neuropathy (which has many causes). So you do need to get checked out with your doc to rule out these other conditions, which may not respond to yoga so favorably.
Once you have been diagnosed, you will obviously want to do something to diminish the number of attacks or completely prevent them. A yoga asana approach would include practices and poses that bring movement and stretching to the lower legs, as well as practices that quiet the nervous system, as nerve dysfunction is one of the purported causes of NLCs. I’d start by reclining on the back and doing Thread the Needle pose (Sucirandhrasana), also known as Eye of the Needle or Figure 4 pose. Focus on circling your ankles as well as flexing and extending your foot at the ankle joint.
From there, I’d take one leg up into Reclined Leg Stretch pose. Start with the strap on your heel pad for a few breaths, move it to the arch of your foot for a few breaths, and finally place it on the ball of your foot and more actively pull down with the strap as you push up with the heel of the foot. This last variation will likely give you the most feeling of stretch in the calf muscles, which include the superficial gastrocnemius, the deep soleus, the posterior-lateral peroneus longus, and the posterior-medial tibialis posterior.
Many of the standing poses will bring some stretch to your calves and feet, especially the back foot in poses like Warrior 1 and Pyramid pose (Parsvottanasana). But even Warrior 2, Triangle pose and Extended Side Angle pose (Parsvokanasana) will provide a little stretch to the area, and might be better starting poses for newer students with lots of tightness in that calves. Wall Calf Stretch (a modified version of Warrior 1 with the toes of your front foot touching the wall and either hands or forearms on the wall) really isolates the calf muscles nicely, too. There are other poses that will have some nice benefits for the calves as well, like versions of Childs pose that will bring some stretching pressure and compression from the thigh bones and body down onto the calves and lend to some widening of the muscles. So throw a few Childs poses in the mix. And you can fulfill the “exercise” part of the recommendation by doing more active flowing practices, which will encourage warming and improved circulation to the lower extremities. And finishing off with some supported inversions like Legs Up the Wall or Chair Shoulderstand will release increased blood pressure from the legs for a bit, which could have a lovely calming effect on your legs, as well as your nervous system.
Pranayama practices that quiet the nervous system, like extending the exhalation (perhaps a 1:2 ratio of inhale to exhale) and others would be of great benefit, as would a body scan meditation, where you encourage all of the muscles of your body to release deeply. Such a meditation could be done just prior to bed to prepare you for a good night’s sleep. There are, of course, other options you could include, but this will get you or your students started if nocturnal leg cramps are disturbing your rest. Let us know if you have a favorite calf release that I did not mention. We love your feedback!
Recently while reading through one of my Family Medicine journals, I came across an article that caught my interest due to the frequent complaints of some of my students. It was on nocturnal leg cramps. Yes, quite often my students will ask me what they can do to address these ill-timed leg cramps (as if there is any good time for a leg cramp!). I’ll get into what we know about the nocturnal leg cramps (NLCs) in a minute, but what caught my eye in reading was the recommendation for treatment:
“Limited evidence supports treating NLCs with exercise and stretching…”
Now, they don’t specify yoga, but as we all know by now, modern yoga would fit the bill. This treatment was recommended before any mention of medications, which is quite unusual for these journal articles. It is usually the other way around—meds first, non-drug options mentioned last. This gave me a great sense of hope that modern medicine is beginning to grasp the benefit of starting with non-drug treatments for some conditions!
So what are these NLCs and how common are they? Well, according to the American Academy of Family Practice, they are super common, with up to 60% of adults reporting they get these kind of leg cramps. They are described as recurrent, painful tightening of muscles in the legs, usually the calf muscles. And the NLCs can contribute significantly to insomnia. The exact cause in not known, but they hypothesize that the cramps are probably caused by muscle fatigue or nerve dysfunction, as opposed to low levels of blood electrolytes like sodium, potassium and such, or from other abnormalities.
Just to flesh out the symptoms of NLCs, they are painful and incapacitating, like no walking while they are occurring! They last an average of nine minutes per episode, and the first bout can be followed by hours of recurrent episodes and residual pain. Even though the calf is the most common muscle affected, cramps in the feet and thighs are also fairly common. Sufferers describe them as a spasm, tightening, twinge, strain, or a muscle seizure. And they are usually in one leg, and can cause the limb to move.
Folks with other conditions are sometimes more likely to have NLCs, such as those with vascular diseases, lumbar canal stenosis (narrowing of the spinal cord channel in the lower back), cirrhosis of the liver, patients on hemodialysis, and those who are pregnant, to name a few. Certain medications are also associated with NLCs, such as estrogen, Naprosyn and others. So, definitely check that out with your family MD if you start having them. NLCs are different from other conditions that might seem similar, like restless leg syndrome, claudication (cramps due to vascular narrowing of blood vessels in legs that occur with walking), myositis (muscle inflammation), and peripheral neuropathy (which has many causes). So you do need to get checked out with your doc to rule out these other conditions, which may not respond to yoga so favorably.
Once you have been diagnosed, you will obviously want to do something to diminish the number of attacks or completely prevent them. A yoga asana approach would include practices and poses that bring movement and stretching to the lower legs, as well as practices that quiet the nervous system, as nerve dysfunction is one of the purported causes of NLCs. I’d start by reclining on the back and doing Thread the Needle pose (Sucirandhrasana), also known as Eye of the Needle or Figure 4 pose. Focus on circling your ankles as well as flexing and extending your foot at the ankle joint.
From there, I’d take one leg up into Reclined Leg Stretch pose. Start with the strap on your heel pad for a few breaths, move it to the arch of your foot for a few breaths, and finally place it on the ball of your foot and more actively pull down with the strap as you push up with the heel of the foot. This last variation will likely give you the most feeling of stretch in the calf muscles, which include the superficial gastrocnemius, the deep soleus, the posterior-lateral peroneus longus, and the posterior-medial tibialis posterior.
Many of the standing poses will bring some stretch to your calves and feet, especially the back foot in poses like Warrior 1 and Pyramid pose (Parsvottanasana). But even Warrior 2, Triangle pose and Extended Side Angle pose (Parsvokanasana) will provide a little stretch to the area, and might be better starting poses for newer students with lots of tightness in that calves. Wall Calf Stretch (a modified version of Warrior 1 with the toes of your front foot touching the wall and either hands or forearms on the wall) really isolates the calf muscles nicely, too. There are other poses that will have some nice benefits for the calves as well, like versions of Childs pose that will bring some stretching pressure and compression from the thigh bones and body down onto the calves and lend to some widening of the muscles. So throw a few Childs poses in the mix. And you can fulfill the “exercise” part of the recommendation by doing more active flowing practices, which will encourage warming and improved circulation to the lower extremities. And finishing off with some supported inversions like Legs Up the Wall or Chair Shoulderstand will release increased blood pressure from the legs for a bit, which could have a lovely calming effect on your legs, as well as your nervous system.
Pranayama practices that quiet the nervous system, like extending the exhalation (perhaps a 1:2 ratio of inhale to exhale) and others would be of great benefit, as would a body scan meditation, where you encourage all of the muscles of your body to release deeply. Such a meditation could be done just prior to bed to prepare you for a good night’s sleep. There are, of course, other options you could include, but this will get you or your students started if nocturnal leg cramps are disturbing your rest. Let us know if you have a favorite calf release that I did not mention. We love your feedback!
Friday, August 16, 2013
Friday Q&A: Multiple Sclerosis
Q:I am curious about how yoga might be used to benefit someone with a diagnosis of Multiple Sclerosis (MS). I have heard about it, but am not sure how to proceed.
A: Thanks for checking in about this. I am surprised we have not addressed this to date, so I am happy we will go over it today! After I did my teacher training in 2001, one of the first workshops I ever attended was down in the South Bay, where a well known teacher from Catalina Island, CA named Eric Small was teaching a weekend workshop for the National MS Society on “Yoga for People with Multiple Sclerosis.” In my previous incarnation as a full-time family MD, I had cared for a few patients who had the diagnosis of MS. But honestly, it was their neurologist that really addressed their MS and its symptoms more than I did. If only I had known then what I learned from Eric back in 2001, I would have had some very powerful tools to address this serious condition. And, boy, was I learning from the right person. Eric was diagnosed with MS as a young adult and had a pretty severe first episode, which made it hard for him to even walk without the aid of crutches. Fortunately, he attended one of BKS Iyengar’s first classes in San Francisco in the late 60s and was taken under the master’s wings and taught how to work with his condition using yoga practices. Eric has rarely had any additional symptoms, a rare story with MS, indeed.
For those of you out there unfamiliar with MS, it is the most common neurological condition that leads to work disability in younger adults. Two-thirds of people with MS are diagnosed between the ages of 20-40, and although it is not a cause of premature death, it does often lead to significant disability. The theory behind MS is that the body develops an auto-immune response to the protective sheath that surrounds the nerves in the brain called myelin sheath, attacking it as if it were a virus or bacteria. Not only does this lead to scarring of the myelin, but it can affect the underlying nerve as well. The result is that communication running down the damaged nerves slows or stops, leading to all kinds of unwelcome symptoms, like muscle weakness, spasticity, lack of coordination, loss of balance, gait difficulties, tremors, swallowing trouble, speech disorders; numbness, tingling, burning, or pain; blurred vision, double vision, blind spots or blindness; bowel and bladder problems like urgency, frequency, retention, incontinence and constipation; as well as vertigo, depression, or emotional labiality; and short term memory loss and impaired concentration are the most common cognitive signs. This is a staggering array of symptoms, and because no two MS suffers will have the same constellation of symptoms, it can take a while to even get to an accurate diagnosis of MS.
There are a few different patterns for the affects people experience, and I am going to suggest that if you want to know more about that, check out the National MS Society website. But let's say that in many cases the symptoms will intensify for a while, referred to as a relapse, and at times they will diminish for a while, called remission. One of the main complaints from those with MS during a relapse is fatigue and heat intolerance. They often note fatigue arising in the late afternoon, and symptoms worsening if the environment is hot or if they overheat with activity. This is a perfect point of entry for yoga, especially quieter poses, restorative practices and breath work.
![]() |
| Viparita Karani (Legs Up the Wall Pose) |
Because these students also often have some degree of spasticity as well as movement and gait disturbance, the systematic stretching and breath attention of yoga releases tension in the areas affected, while improving circulation and enhancing awareness of the student’s body. Body awarenessaids in recognizing and regulating an individual’s unique MS symptoms. In addition, regular practice will also improve coordination, helping directly with balance issues and helping with transferring.
Many MS students may be using a cane, crutches or a wheelchair some of the time, so you will need to become familiar with using all of the props you can. Chair practices (Chair Yoga) are helpful, but even having poses these students can do in bed will be very helpful if they can not transfer to a chair or the floor easily. So, depending on the individual’s function on any given day, you will either be doing a fairly typical yoga class, a chair yoga class or a very modified class in the wheelchair or in a bed. The key will be to keep things quiet and cooling in general. During times of remission, if there are minimal symptoms, you could try sharing a regular intensity class, as long as heating poses or sequences don’t lead to a flare of symptoms. I’m hopeful these general guidelines will give you a place to begin your exploration of yoga for MS.
—Baxter
Tuesday, August 13, 2013
Cortisol and Good Health
by Baxter
We have mentioned one of the body’s important hormones, cortisol, on these pages a few times in the recent past, but always with the slant of it somehow being a problem child, a bad actor, a rotten apple, as it were. But cortisol, when it is working in harmony with a well-balanced body and mind, is part of a elegant system that tries to help us respond in the best way possible to short term stressful situations that are bound to arise in our daily lives. So on a daily basis, during the early morning hours - around 4-5 am, the body releases a bit of cortisol to get your inner furnace ready for the first foot hitting the floor in the morning. It releases a bit of sugar into the blood stream, sends a bit more blood to the brain and heart, and really gets us ready for action, however mellow or intense our morning will be. Then, if the day is relatively uneventful, the level of cortisol gradually diminishes to its lowest levels around 10pm.
| Fallen Tree by Brad Gibson |
When released in response to unexpected stressful events, it has many more helpful roles to play. It has a strong anti-inflammatory effect, which is helpful with acute injury, so it can act like a fire truck when the body’s immune response to infection is too strong by decreasing the life span and production of one of our white blood cells known as lymphocytes. Basically, it tries to keep a balanced approach to infections.
Cortisol has an effect on the cardio-vascular (CV) system by controlling the smooth muscles in the walls of our arteries. In normal circumstances, this allows cortisol to help boost our blood pressure in the short run when we need extra work from the CV system. It has effects on the central nervous system (CNS), too, influencing behavior, mood, excitability, and the electrical activity of neurons. When we put all that together, cortisol is designed to respond to stress by providing fuel in the form of glucose, mobilizing fat and proteins for back-up fuel supply, modifying the immune response, heartbeat, blood pressure, brain alertness and the response of the nervous system to get us through the rough spots.
The cool thing about cortisol is that is has evolved to enhance the body’s response to stress while also protecting from excessive response to stress. The key thing about the place that produces cortisol, the adrenal glands, is that they need time to recover after stressful events have passed. And herein lies the rub! If we give the body some time to recover between stressful events, the adrenal glands can do their job well, cortisol levels are adequate to the demands of the body, and you stay healthy and ready for the next stressful event.
But if you are either under constant stress, or your mind is prone to brooding about the past or anxious musings about the future or even negative assessments about the present moment, your adrenals interpret this as an actual stressful event occurring right now, and cortisol gets released into your system. So cortisol levels remain high in the blood stream for greater periods of time, which can result in swelling of the gland itself, and an increased chance of the following negative effects: loss of immunity secondary to shrinkage of lymph glands, increased risk of stomach ulcers, increased risk of hypertension, heart disease and other vascular disorders, excess sugar in the blood stream and more chance of developing diabetes. Not a good outlook!
And as I mentioned last week, chronic stress depletes your supply of cortisol and can steal the building blocks of your sex hormones (see Yoga and Male Menopause), thus negatively impacting your sexual function and your reproductive capacity. What’s a yogi to do?
![]() |
| Supta Baddha Konasana (Reclined Cobbler's Pose) |
The good news is that your regular yoga practice, if it includes those much needed restorative poses (see Restorative Yoga), yoga nidra (see Yoga Nidra and Deep Relaxation), long guided meditations and generous Savasana (see Savasana Variations), should be the perfect balancing act for keeping the adrenals healthy and the cortisol cycle in synch with your changing needs. One fact that might influence your asana and even your exercise regimen is that aerobic or effort-full exercise (and some forms of yoga definitely fit the bill) can cause a release of cortisol to deal with the short term “stress” of the increased physical effort. If you work out or do asana in the morning, when there is still a bit of cortisol around from the 4 am release, the effects of the brief elevation are minimal. However, a late day work out could be theoretically more problematic, with a negative effect on sleep patterns as one possible side effect. So I would recommend active workouts and asana for the morning, and restorative practices in the evening if you want or need to do something later in the day.
So remember, cortisol is a good guy just trying to do its job. It’s the stress and our reactions to it that are really the culprits. Fortunately, we have the technology to neutralize this threat to our healthy aging!
Tuesday, August 6, 2013
Don't Forget Us Fellas: Yoga and Male Menopause
by Baxter
Nina and Shari’s posts over the last week (see Yoga for Menopause: An Overview, Yoga for Menopause: Fatigue, Yoga for Menopause: Headaches, and Yoga for Menopause: Joint Problems) and the workshop I just completed this weekend on the endocrine system reminded me that men also face changes related to the sex hormones of the body that can lead to challenges as we age. So it seemed like the right time to talk about men, aging, and the sex hormones or androgens, especially testosterone.
Just as girls begin to experience hormonal changes as they approach puberty that lead to the growth and developments of their sexual organs and ability to get pregnant, boys at the onset of puberty also begin to experience hormonal shifts that lead to the development of the testes and penis and the secondary sexual characteristic, like body hair pattern, muscular development, voice changes and such. The brain starts putting out signals from the hypothalamus deep at its core that signal the pituitary gland, also buried deep in the center of the brain, to release two hormones found in both men and women: luteinizing hormone (LH) and follicle stimulating Hormone (FSH). In women, these chemical messengers turn on the ovaries, get them producing estrogen and progesterone, and begin the menstrual cycles that will continue until a woman reaches menopause at around age 50. For men, these same two hormones cause two things to happen in the adrenal glands (atop the kidneys) and the testicles: the maturation of the sperm and the production of testosterone and other male hormones called Androgens. And for the rest of a man’s life, the brain and the adrenals and testicles maintain communication to ensure proper amounts of sperm are produced and testosterone are around.
The presence of normal levels testosterone (T) and the other male androgens confer normal fertility, ability to ejaculate normally, normal sex drive, and normal bone strength. Testosterone also influences the normal functioning of certain mental processes, such as the ability to concentrate and focus on one task at a time. The downside of this is it does not help men multitask very well! Anyone surprised by that out there? Additionally, T influences fat distribution, muscle mass and strength and red blood cell production in men. (And women: yes, you all have some T in your system, a lot less (1/16th) than men, but your system is more sensitive to the T that is around.)
As men age, levels of T usually gradually diminish. According to the Mayo Clinic: “Testosterone peaks during adolescence and early adulthood. As you get older, your testosterone level gradually declines—typically about 1 percent a year after age 30. It is important to determine in older men if a low testosterone level is simply due to the decline of normal aging or if it is due to a disease (hypogonadism).”
This gradual decline, unlike the more sudden changes that occur for most women in the decade before age 50, may or may not lead to specific noticeable changes for men. But there are some changes that could be directly a result of lower T levels: changes is sexual function, changes in sleep patterns, changes in physical appearance (such as increased fat, decreasing muscle mass and strength and decreased bone density), and even hot flashes in rare cases. Emotional changes can also happen. The Mayo Clinic mentions the following: “Low testosterone may contribute to a decrease in motivation or self-confidence. You may feel sad or depressed, or have trouble concentrating or remembering things.”
Keep in mind, just as the changes that women experience as they traverse menopause can be considered normal changes associated with the aging process, some of the signs and symptoms just mentioned are can also be considered a normal part of the male aging process. The only way to find out if they are due to an abnormal drop in T production is to check it via a blood test. Now, one might think: if my T levels are too low, I should just take T as a supplement, right? Well, the research to date does not support that idea, and T replacement, just like estrogen/progesterone replacement for women, can have unwanted side effects. So what is a fellow to do?
There is one interesting fact having to do with the effect of chronic stress on the male sex hormones that could be great motivation to start or continue practicing yoga as a way to work with the expected decline in male testosterone levels. Chronic stress leads to elevated levels of the hormone cortisol, which helps you deal with the short-term consequences of stressful events, but have negative long-term effects if continually stimulated, as happens in chronic stress. And when levels of cortisol begin to drop in the adrenal glands, the glands starts using DHEA, a precursor to the male androgens, including T, to make cortisol. This can result in an abnormal decrease in testosterone.
Of course, we also know that yoga is a great way to deal with chronic stress, and this has been demonstrated by many scientific studies. Athough we have reviewed this before in a few different posts, we haven't yet made the connection to how it impacts the endocrine system and specifically, the male sex hormones. Now the dots have officially been connected! Take it from me, a well-balanced yoga practice that includes both active yoga postures and restorative practices, including pranayama and meditation, done regularly could be just the ticket to getting your T back where it ought to be, at any stage of your life, fellas!
![]() |
| Baxter and Friend by Melina Meza |
Just as girls begin to experience hormonal changes as they approach puberty that lead to the growth and developments of their sexual organs and ability to get pregnant, boys at the onset of puberty also begin to experience hormonal shifts that lead to the development of the testes and penis and the secondary sexual characteristic, like body hair pattern, muscular development, voice changes and such. The brain starts putting out signals from the hypothalamus deep at its core that signal the pituitary gland, also buried deep in the center of the brain, to release two hormones found in both men and women: luteinizing hormone (LH) and follicle stimulating Hormone (FSH). In women, these chemical messengers turn on the ovaries, get them producing estrogen and progesterone, and begin the menstrual cycles that will continue until a woman reaches menopause at around age 50. For men, these same two hormones cause two things to happen in the adrenal glands (atop the kidneys) and the testicles: the maturation of the sperm and the production of testosterone and other male hormones called Androgens. And for the rest of a man’s life, the brain and the adrenals and testicles maintain communication to ensure proper amounts of sperm are produced and testosterone are around.
The presence of normal levels testosterone (T) and the other male androgens confer normal fertility, ability to ejaculate normally, normal sex drive, and normal bone strength. Testosterone also influences the normal functioning of certain mental processes, such as the ability to concentrate and focus on one task at a time. The downside of this is it does not help men multitask very well! Anyone surprised by that out there? Additionally, T influences fat distribution, muscle mass and strength and red blood cell production in men. (And women: yes, you all have some T in your system, a lot less (1/16th) than men, but your system is more sensitive to the T that is around.)
As men age, levels of T usually gradually diminish. According to the Mayo Clinic: “Testosterone peaks during adolescence and early adulthood. As you get older, your testosterone level gradually declines—typically about 1 percent a year after age 30. It is important to determine in older men if a low testosterone level is simply due to the decline of normal aging or if it is due to a disease (hypogonadism).”
This gradual decline, unlike the more sudden changes that occur for most women in the decade before age 50, may or may not lead to specific noticeable changes for men. But there are some changes that could be directly a result of lower T levels: changes is sexual function, changes in sleep patterns, changes in physical appearance (such as increased fat, decreasing muscle mass and strength and decreased bone density), and even hot flashes in rare cases. Emotional changes can also happen. The Mayo Clinic mentions the following: “Low testosterone may contribute to a decrease in motivation or self-confidence. You may feel sad or depressed, or have trouble concentrating or remembering things.”
Keep in mind, just as the changes that women experience as they traverse menopause can be considered normal changes associated with the aging process, some of the signs and symptoms just mentioned are can also be considered a normal part of the male aging process. The only way to find out if they are due to an abnormal drop in T production is to check it via a blood test. Now, one might think: if my T levels are too low, I should just take T as a supplement, right? Well, the research to date does not support that idea, and T replacement, just like estrogen/progesterone replacement for women, can have unwanted side effects. So what is a fellow to do?
There is one interesting fact having to do with the effect of chronic stress on the male sex hormones that could be great motivation to start or continue practicing yoga as a way to work with the expected decline in male testosterone levels. Chronic stress leads to elevated levels of the hormone cortisol, which helps you deal with the short-term consequences of stressful events, but have negative long-term effects if continually stimulated, as happens in chronic stress. And when levels of cortisol begin to drop in the adrenal glands, the glands starts using DHEA, a precursor to the male androgens, including T, to make cortisol. This can result in an abnormal decrease in testosterone.
Of course, we also know that yoga is a great way to deal with chronic stress, and this has been demonstrated by many scientific studies. Athough we have reviewed this before in a few different posts, we haven't yet made the connection to how it impacts the endocrine system and specifically, the male sex hormones. Now the dots have officially been connected! Take it from me, a well-balanced yoga practice that includes both active yoga postures and restorative practices, including pranayama and meditation, done regularly could be just the ticket to getting your T back where it ought to be, at any stage of your life, fellas!
Tuesday, July 30, 2013
Forbes Magazine Gives Yoga a Thumb$ Up
by Baxter
I love it when capitalist magazines find something good to say about yoga, even if it is how it is making someone lots of money. But in this case, Forbes says yoga might save the US trillions of dollars in lost productivity for our economy. How so, you ask? Why, for a start, by reducing the dropout rate from high schools in this country, rates that shockingly range from 30% in most places to over 50% in our urban “war zones.” (I call them war zones because of the continual violent backdrop that these children are subjected to day in and day out; where just walking to and from school, let alone being in school, is a constant cause for anxiety and worry about getting hurt or killed.)
What was a delight to see is one of the featured yoga experts quoted frequently in the article, BK Bose, in whose Niroga Institute in Berkeley, CA, I have had the great pleasure of teaching for the past several years. Bose, who started his career as a software engineer in the high tech industry in Silicon Valley, has more recently focused his work on bringing yoga to under-served communities, and training teachers to work with these special populations. These include classes at the Alameda County Juvenile Hall, low-income public schools and low-income senior centers, to name just a few. His work, as with most small operations around the country, is done as a non-profit venture. Even on its smaller scale, the results of the yoga classes are significant.
And after all, if we can influence the health of our youngest at an early age, that should lead to a longer, healthier life as they age (and, of course, many of our readers have school-aged children). The key underlying factor that Bose identifies as the culprit in so many of the challenges our young face is chronic stress. We have written on many occasions about the ways in which yoga can help us deal with stress. But what about in our kids, and in the growing number of kids that have to deal with gangs, substance abuse, and crime in their neighborhoods? This adds a whole new twist on doing straight up mindfulness techniques. These techniques can work quite well for children who don’t have the kinds of violent communities that Bose’s programs work with, as you will see below.
For me, as I read the article, I found one concept that comes from mind-body research defined in a new way that I could relate to from my own yoga teaching. I often refer to the mind’s background chatter as “monkey mind” or “restless mind,” and the tendency is for this kind of thinking to have a background feeling of anxiety or stress associated with it. The following paragraph from the Forbes article talks about what mindfulness practices do to the brain, including the new phraseology “default mode network (DMN)” which I find confirming of my own observations:
“In 2011, a Harvard study showed that mindfulness is linked to increased gray matter density in certain cortical areas, including the prefrontal cortex and regions involved in self-referential thoughts and emotion regulation. There seems to be a strong connection between mindfulness and the brain machinery involved in self-regulation. Other work has shown mindfulness to be linked to relative de-activation of the default mode network (DMN), the brain system that’s active during mind-wandering and self-referential “worry” thoughts, which are generally stressful in nature.”
Mindfulness practices, then, help us change the way we are thinking, or at least the way we are focusing our minds, which changes our stress response. For a young person, this might equate to changed behavior, in which he or she has more control over emotional reactions that might lead to trouble. Bose, however, notes that in his students who live in violent communities and are more often directly or indirectly victims of trauma, mindfulness is not going to work. As the article points out:
“This is all well and good, Bose adds, but there’s an obvious caveat. When they’re in the midst of stress and trauma, few kids have the ability to sit still enough to take part in a sitting practice. “If you’re not ready to sit in classroom,” says Bose, “you’re not ready to do sitting meditation. If you have drugs and gangs and violence all around you, you simply can’t sit still. Teachers tell us that they often yell at kids 100 times a day to sit and pay attention. It doesn’t work. And to ask them to do this in the context of meditation can have a worse-than-neutral effect – it could be disastrous.”
He says that you have to go beyond mind-body research to trauma research, which tells us that physical activity can help the brain deal with stress and trauma.
“Trauma research tell us that we hold trauma in our bodies… Neuroscience says mindfulness; trauma research says movement. All of the sudden you’ve got moving meditation or mindfulness in motion. Mindfulness alone isn’t going to cut it for these kids.”
Even for adults who carry a lot of anxious energy stored up in their bodies, we here at Yoga for Healthy Aging have advocated for the necessity of movement practices, sometimes more vigorous yoga styles, as an initial stage in leading to deeper relaxation and stress reduction in your daily practice. Turns out to be true for kids with trauma, too.
The take-away from this Forbes exposure of yoga to a larger audience in the US and for us yogis here as well is that it may prove invaluable to teach young and old alike to do yoga, combining active asana and quieter mindfulness practices for maximum benefit. And that it would be a good idea to change policy on a national level to fund such ventures, so everyone at least has access to trying yoga, to see if it works for them. What an interesting, and possibly wonderful, world that could be!
![]() |
| View From Above by Melina Meza |
What was a delight to see is one of the featured yoga experts quoted frequently in the article, BK Bose, in whose Niroga Institute in Berkeley, CA, I have had the great pleasure of teaching for the past several years. Bose, who started his career as a software engineer in the high tech industry in Silicon Valley, has more recently focused his work on bringing yoga to under-served communities, and training teachers to work with these special populations. These include classes at the Alameda County Juvenile Hall, low-income public schools and low-income senior centers, to name just a few. His work, as with most small operations around the country, is done as a non-profit venture. Even on its smaller scale, the results of the yoga classes are significant.
And after all, if we can influence the health of our youngest at an early age, that should lead to a longer, healthier life as they age (and, of course, many of our readers have school-aged children). The key underlying factor that Bose identifies as the culprit in so many of the challenges our young face is chronic stress. We have written on many occasions about the ways in which yoga can help us deal with stress. But what about in our kids, and in the growing number of kids that have to deal with gangs, substance abuse, and crime in their neighborhoods? This adds a whole new twist on doing straight up mindfulness techniques. These techniques can work quite well for children who don’t have the kinds of violent communities that Bose’s programs work with, as you will see below.
For me, as I read the article, I found one concept that comes from mind-body research defined in a new way that I could relate to from my own yoga teaching. I often refer to the mind’s background chatter as “monkey mind” or “restless mind,” and the tendency is for this kind of thinking to have a background feeling of anxiety or stress associated with it. The following paragraph from the Forbes article talks about what mindfulness practices do to the brain, including the new phraseology “default mode network (DMN)” which I find confirming of my own observations:
“In 2011, a Harvard study showed that mindfulness is linked to increased gray matter density in certain cortical areas, including the prefrontal cortex and regions involved in self-referential thoughts and emotion regulation. There seems to be a strong connection between mindfulness and the brain machinery involved in self-regulation. Other work has shown mindfulness to be linked to relative de-activation of the default mode network (DMN), the brain system that’s active during mind-wandering and self-referential “worry” thoughts, which are generally stressful in nature.”
Mindfulness practices, then, help us change the way we are thinking, or at least the way we are focusing our minds, which changes our stress response. For a young person, this might equate to changed behavior, in which he or she has more control over emotional reactions that might lead to trouble. Bose, however, notes that in his students who live in violent communities and are more often directly or indirectly victims of trauma, mindfulness is not going to work. As the article points out:
“This is all well and good, Bose adds, but there’s an obvious caveat. When they’re in the midst of stress and trauma, few kids have the ability to sit still enough to take part in a sitting practice. “If you’re not ready to sit in classroom,” says Bose, “you’re not ready to do sitting meditation. If you have drugs and gangs and violence all around you, you simply can’t sit still. Teachers tell us that they often yell at kids 100 times a day to sit and pay attention. It doesn’t work. And to ask them to do this in the context of meditation can have a worse-than-neutral effect – it could be disastrous.”
He says that you have to go beyond mind-body research to trauma research, which tells us that physical activity can help the brain deal with stress and trauma.
“Trauma research tell us that we hold trauma in our bodies… Neuroscience says mindfulness; trauma research says movement. All of the sudden you’ve got moving meditation or mindfulness in motion. Mindfulness alone isn’t going to cut it for these kids.”
Even for adults who carry a lot of anxious energy stored up in their bodies, we here at Yoga for Healthy Aging have advocated for the necessity of movement practices, sometimes more vigorous yoga styles, as an initial stage in leading to deeper relaxation and stress reduction in your daily practice. Turns out to be true for kids with trauma, too.
The take-away from this Forbes exposure of yoga to a larger audience in the US and for us yogis here as well is that it may prove invaluable to teach young and old alike to do yoga, combining active asana and quieter mindfulness practices for maximum benefit. And that it would be a good idea to change policy on a national level to fund such ventures, so everyone at least has access to trying yoga, to see if it works for them. What an interesting, and possibly wonderful, world that could be!
Tuesday, July 23, 2013
Yoga Better than Injections for Low Back Pain
by Baxter
A July 18th New York Times blog post entitled Alternatives for Back Pain Relief surprised me when it proclaimed that a modern and widely used treatment method for low back pain is no longer considered effective, especially for chronic or long-standing low back pain. That treatment is the use of injections into the areas of pain. The injections usually contain the inflammation-decreasing drug cortisone, but can also have ingredients like morphine, ibuprofen and vitamin B12 in the mix. Over the years I have had many patients come to me with low back pain, and from their reports, the effectiveness of the injections never seemed particularly strong. For some patients with new acute low back pain, who experienced more serious signs and symptoms, like radiating pain to the leg or actual weakness, the injections more often seemed to provide some temporary pain relief.
However, several new studies have revealed that, when looking back at those patients treated with injections, the injections were not significantly more effective than no treatment at all. And one study indicated that those who did not get injections for a pinched nerve in the lower back fared better down the road than the patients who received an injection course. In the commentary published in a recent issue of JAMA:
“Based on the available data, the JAMA authors conclude, doctors “should not” recommend injection therapy to their patients with chronic low back pain.”
That may be a hard pill for some doctors to swallow, as there has been a steady increase in the use of injections for low back pain, mainly because it is relatively inexpensive, can be done as an outpatient in the office, has fewer risks compared to surgery, and makes the docs some bling. The possible one positive use of injections is that is does often provide some temporary relief of low back pain symptoms.
The New York Times post then went on to reference a recent systematic review of yoga for low back pain that we reported on here early this year. This study looked back at all of the best designed studies on the subject and concluded that there was “strong evidence of short term effectiveness of yoga for low back pain and moderate evidence of long-term effectiveness of yoga.”
But although the New York Times post mentions the clear benefit of yoga for short-term back pain, it does not emphasize the second claim that the study discovered: moderate evidence for yoga's help over the long term. I took another look at the study itself, and discovered an important caveat: the authors would only recommend Viniyoga style practice for long-term benefits, as the other yoga methods studied did not demonstrate the same benefits. As they state:
"The American Pain Society's guidelines recommend that clinicians consider offering yoga to patients with chronic LBP (lower back pain). However, this recommendation is limited to Viniyoga-style yoga as the net benefits for other yoga styles could not be estimated."
Now, I love Viniyoga and integrate its methods into my own practice and teachings, along with the wisdom of the Iyengar method and some other modern yoga styles I’ve learned over the years as well. But I suspect that some of the alignment-strong styles, like the Iyengar method, will prove to be helpful in the long run as well, but we will need better studies to bear that out. That said, for those who are not familiar with Viniyoga (a term coined by American yoga teacher Gary Kraftsow for the yoga he learned from T. Krishnamacharya and TKV Desikachar) I would recommend to you two books to learn more:
And don’t forget, my live webinar on Yoga for Healthy Digestion starts today, Tuesday July 23, 2013 on Yoga U online! Click here to learn more about it and sign up to join me Tuesday and Thursday from 8:30 EST (5:30 PST).
A July 18th New York Times blog post entitled Alternatives for Back Pain Relief surprised me when it proclaimed that a modern and widely used treatment method for low back pain is no longer considered effective, especially for chronic or long-standing low back pain. That treatment is the use of injections into the areas of pain. The injections usually contain the inflammation-decreasing drug cortisone, but can also have ingredients like morphine, ibuprofen and vitamin B12 in the mix. Over the years I have had many patients come to me with low back pain, and from their reports, the effectiveness of the injections never seemed particularly strong. For some patients with new acute low back pain, who experienced more serious signs and symptoms, like radiating pain to the leg or actual weakness, the injections more often seemed to provide some temporary pain relief.
However, several new studies have revealed that, when looking back at those patients treated with injections, the injections were not significantly more effective than no treatment at all. And one study indicated that those who did not get injections for a pinched nerve in the lower back fared better down the road than the patients who received an injection course. In the commentary published in a recent issue of JAMA:
“Based on the available data, the JAMA authors conclude, doctors “should not” recommend injection therapy to their patients with chronic low back pain.”
That may be a hard pill for some doctors to swallow, as there has been a steady increase in the use of injections for low back pain, mainly because it is relatively inexpensive, can be done as an outpatient in the office, has fewer risks compared to surgery, and makes the docs some bling. The possible one positive use of injections is that is does often provide some temporary relief of low back pain symptoms.
The New York Times post then went on to reference a recent systematic review of yoga for low back pain that we reported on here early this year. This study looked back at all of the best designed studies on the subject and concluded that there was “strong evidence of short term effectiveness of yoga for low back pain and moderate evidence of long-term effectiveness of yoga.”
But although the New York Times post mentions the clear benefit of yoga for short-term back pain, it does not emphasize the second claim that the study discovered: moderate evidence for yoga's help over the long term. I took another look at the study itself, and discovered an important caveat: the authors would only recommend Viniyoga style practice for long-term benefits, as the other yoga methods studied did not demonstrate the same benefits. As they state:
"The American Pain Society's guidelines recommend that clinicians consider offering yoga to patients with chronic LBP (lower back pain). However, this recommendation is limited to Viniyoga-style yoga as the net benefits for other yoga styles could not be estimated."
Now, I love Viniyoga and integrate its methods into my own practice and teachings, along with the wisdom of the Iyengar method and some other modern yoga styles I’ve learned over the years as well. But I suspect that some of the alignment-strong styles, like the Iyengar method, will prove to be helpful in the long run as well, but we will need better studies to bear that out. That said, for those who are not familiar with Viniyoga (a term coined by American yoga teacher Gary Kraftsow for the yoga he learned from T. Krishnamacharya and TKV Desikachar) I would recommend to you two books to learn more:
- The Heart of Yoga by TKV Desikachar
- Yoga for Wellness by Gary Kraftsow
And don’t forget, my live webinar on Yoga for Healthy Digestion starts today, Tuesday July 23, 2013 on Yoga U online! Click here to learn more about it and sign up to join me Tuesday and Thursday from 8:30 EST (5:30 PST).
Tuesday, July 16, 2013
Yoga and Healthy Eating: How Yoga Helps You Tune in to the Effects of Your Dietary Choices
by Baxter
It is always a bit bittersweet for me come mid-July when I return from my annual yoga retreat at the Feathered Pipe Ranch in Helena, Montana. It is a magical place for my students, and me, and most of our every-day needs are met by the staff at the Ranch, freeing us up to dive deep into the yoga and community.
At this year’s retreat, I focused on many of the concepts we talk about here at Yoga For Healthy Aging, including therapeutic sessions on topics ranging from arthritis to digestion. One of the lovely things about going on these sorts of retreats is that all of your meals are prepared for you, and all you have to do is show up for meal times. The Ranch is no different, and they pride themselves of the variety of healthy, mostly organic foods that they prepare for us each year, from Indian to Thai to Mexican, to the “Toledo Lunch” (a throwback to my childhood favorite, grilled cheese sandwiches and tomato soup). In addition, they always have tempting desserts, from fruit cobbler to fresh baked cookies and cakes to something outrageous called Chocolate Decadence! The downside to this, at least from my perspective, is that the food is served buffet style, so there is the daily opportunity to overeat, despite the overall healthy options provided (minus some of the desserts, of course!)
I have to remind myself to be more mindful about my eating when at the Ranch. It is very easy to make a second trip up for some more of my favorite things, even when my first plate of food was more than sufficient to satisfy my hunger. Satiety is different than eating until I feel “stuffed.” which unfortunately happened a few times last week. But because I was also on retreat in my own way, even though I was teaching twice each day, I was able to have the time to meditate consistently first thing in the morning for about 15 minutes. I found that as I sat quietly focused on my breath or simple mantra (see How to Start a Meditation Practice), I became acutely aware of how my body was feeling and responding to the previous day's food choices. I also would recall if I woke in the middle of the night with indigestion, gas, bad dreams, or the urgent need to use the bathroom. This feedback allowed me to more consciously set an intention around my food choices for the rest of the day.
Since I tend to desire more processed sugar than is healthy for me, (is it really healthy for anyone?), I began to modify my breakfasts, the only meal I prepared for myself in the little teacher’s cabin kitchen, leaving out the jam on my toast and adding in a piece of fresh fruit to satisfy that sweet taste desire that I have. And I began to notice that my energy levels were higher for the rest of the morning as the week progressed. Quite motivating! I have to admit that dessert time was still a tough one, but was at least more mindfully dished and consumed than earlier in the week.
Surprisingly, I realized I was looking forward to being back in my own kitchen where I could more easily design my meals for not just quality, but also quantity. All these insights about behavior changes and choices arose directly out of the introspective practices of yoga, like simple breath awareness. They were there for me, and they are available for you, too. As we keep reminding you, consistent practice is a key feature of transformational practice. I did my meditation first thing today again, and my continued healthy, well-proportioned meals choices are reflecting it!
I've been thinking a lot about healthy eating and healthy digestion because my two-part online course at Yoga U is coming up soon. To sign up for the course, you can register here. For a free audio interview with me on yoga for healthy digestion, download the interview here.
![]() |
| Fresh Bread and Fresh Butter made and photographed by Rosie Gibson |
At this year’s retreat, I focused on many of the concepts we talk about here at Yoga For Healthy Aging, including therapeutic sessions on topics ranging from arthritis to digestion. One of the lovely things about going on these sorts of retreats is that all of your meals are prepared for you, and all you have to do is show up for meal times. The Ranch is no different, and they pride themselves of the variety of healthy, mostly organic foods that they prepare for us each year, from Indian to Thai to Mexican, to the “Toledo Lunch” (a throwback to my childhood favorite, grilled cheese sandwiches and tomato soup). In addition, they always have tempting desserts, from fruit cobbler to fresh baked cookies and cakes to something outrageous called Chocolate Decadence! The downside to this, at least from my perspective, is that the food is served buffet style, so there is the daily opportunity to overeat, despite the overall healthy options provided (minus some of the desserts, of course!)
I have to remind myself to be more mindful about my eating when at the Ranch. It is very easy to make a second trip up for some more of my favorite things, even when my first plate of food was more than sufficient to satisfy my hunger. Satiety is different than eating until I feel “stuffed.” which unfortunately happened a few times last week. But because I was also on retreat in my own way, even though I was teaching twice each day, I was able to have the time to meditate consistently first thing in the morning for about 15 minutes. I found that as I sat quietly focused on my breath or simple mantra (see How to Start a Meditation Practice), I became acutely aware of how my body was feeling and responding to the previous day's food choices. I also would recall if I woke in the middle of the night with indigestion, gas, bad dreams, or the urgent need to use the bathroom. This feedback allowed me to more consciously set an intention around my food choices for the rest of the day.
Since I tend to desire more processed sugar than is healthy for me, (is it really healthy for anyone?), I began to modify my breakfasts, the only meal I prepared for myself in the little teacher’s cabin kitchen, leaving out the jam on my toast and adding in a piece of fresh fruit to satisfy that sweet taste desire that I have. And I began to notice that my energy levels were higher for the rest of the morning as the week progressed. Quite motivating! I have to admit that dessert time was still a tough one, but was at least more mindfully dished and consumed than earlier in the week.
Surprisingly, I realized I was looking forward to being back in my own kitchen where I could more easily design my meals for not just quality, but also quantity. All these insights about behavior changes and choices arose directly out of the introspective practices of yoga, like simple breath awareness. They were there for me, and they are available for you, too. As we keep reminding you, consistent practice is a key feature of transformational practice. I did my meditation first thing today again, and my continued healthy, well-proportioned meals choices are reflecting it!
I've been thinking a lot about healthy eating and healthy digestion because my two-part online course at Yoga U is coming up soon. To sign up for the course, you can register here. For a free audio interview with me on yoga for healthy digestion, download the interview here.
Tuesday, June 25, 2013
Tucking and Tilting the Pelvis
by Baxter
We recently received an inquiry about positioning the pelvis in yoga poses that I thought it worth addressing in a general, full-length post. Let’s start with the question:
Dear YFHA Staff,
The phrases "Tuck in and Tuck out" are very commonly used by several of my teachers. I get so confused listening to those words that these days the minute I hear anything close to "Tuck" my meditative yoga practice goes for a ride. What are the teachers referring to when they use those words? Are they alluding to the movement of sacrum? For eg: in Bridge pose and other supine poses, do you draw the sacrum in (I guess the word is Tuck in) or do you draw it out? Can't we just keep the sacrum in neutral position and still get the benefits of the supine poses?
Yes, dear reader, there is a lot of talk about “tucking” the pelvis these days in the yoga world! Although I don’t hear or use the same exact phraseology as you teachers are using, I think I have a sense of what they are going for. I might suggest the terms “tipping” and “tucking” of the pelvis, as a whole, for what is being suggested. In anatomical terms, the action can take place relative to the top of the upper leg bone, the femur bone.
When you “tip” the pelvis, this means you are rolling it forward and down over the head of the femur, in what is referred to in anatomical circles as anteversion or flexion at the hip joint. This happens to some extent in forward bending poses, like Uttanasana (Standing Forward Bend), when we roll the hips forward and down to initiate the forward bend.This movement also encourages the forward rounding of the lumbar vertebrae due to the effect of gravity, known as flexion of the lumbar spine, in the specific situation of Uttanasana. Yet we are also sometimes encouraged to extend the lower spine, as in a backbend, when entering into some forward bends. In other words, as the pelvis is rolling forward over the thighbones, we simultaneously extend the rest of the spine as in a backbend. This can be a useful suggestion in some lower back injury situations, or if you are focusing on strengthening the extensors of the back body. But it could be just as helpful in some cases, to allow the natural flexion of the lower back in Uttanasana accompany the anteversion of the pelvis.
The other action, which I call “tucking” of the pelvis, is essentially the opposite action, in which the pelvis rolls backwards over the head of the femur bone. Anatomically, this is called retroversion or extension of the pelvis. It is an essential action, at least to some extent, when we are trying to do some of our back bending poses, like Dhanurasana (Bow pose) or Urdhva Dhanurasana (Upward Bow pose), which require some length and opening at the front of the hip joint to successfully achieve these more advanced backbends. Just like with tipping, the spine may have a natural inclination that accompanies tucking, like some extension of the spine if we are trying to do Upward Bow or Wheel pose. However, if you observe someone standing in Mountain pose, and ask them to exaggerate the tuck, you will notice that the lower spine rounds back, which actually means the vertebrae are tipping forward into flexion. If you then ask the person to tip the pelvis forward, you will see that the lower spine goes into a backbend shape, bowing forward towards the navel. This indicates that the lower spine is going into some extension.
Playing with this movement of the pelvis in Mountain pose is a good way to begin to feel these actions and the results at both the hip joint and the lower spine. You might also start to sense if one way feels more typical of how you hold your pelvis relative to you upper leg bones when standing. If your teacher was suggesting that more tip or tuck would be better for you, see if his or her suggestion actually does what predicted. Be a little skeptical, especially if you are working with a newer teacher. There is a lot of subtlety to this pelvic alignment, and it first it will likely feel a bit strange, even if it ultimately might lead to better posture and lower back alignment. When looking at supine poses, done lying on your back, face up, you will want to do the same experimenting to see what works best for you.
And I have not even mentioned the movements that can happen between the pelvis and the sacrum, known as nutation and counternutation! Shari and I have written some about that elsewhere, so take a re-read of some of those posts (Friday Q&A: Trikonasana, Janu Sirsasana and the Sacrum and Yoga and the Sacrum if you are not familiar with these terms. Judith Lasater, in her book Yoga Body, has a discussion of what happens in regards to these two actions in forward and back bending poses. There is some controversy about how much nutation and counternutation actually take place in adults in yoga poses, but there is a lot of variability in how much “intra-pelvic” movement (between just the two pelvis bones and the sacrum bone) between individuals from my observations. It is always wise to get the opinion of an experienced teacher who can watch your body move in different poses to see where your fall in this regard.
I would also suggest that you directly ask your teacher to stop and demonstrate the actions of tucking so you can get a clearer idea of what he or she is talking about. Sometimes I find that without that clarity, I am just guessing as to what the teacher wants me to experience. And it would also be reasonable to ask why he or she feels this is important to experience. So, ask the how and the why when these sorts of instructions are creating more confusion than clarity, and rock that pelvis on.
We recently received an inquiry about positioning the pelvis in yoga poses that I thought it worth addressing in a general, full-length post. Let’s start with the question:
Dear YFHA Staff,
The phrases "Tuck in and Tuck out" are very commonly used by several of my teachers. I get so confused listening to those words that these days the minute I hear anything close to "Tuck" my meditative yoga practice goes for a ride. What are the teachers referring to when they use those words? Are they alluding to the movement of sacrum? For eg: in Bridge pose and other supine poses, do you draw the sacrum in (I guess the word is Tuck in) or do you draw it out? Can't we just keep the sacrum in neutral position and still get the benefits of the supine poses?
Yes, dear reader, there is a lot of talk about “tucking” the pelvis these days in the yoga world! Although I don’t hear or use the same exact phraseology as you teachers are using, I think I have a sense of what they are going for. I might suggest the terms “tipping” and “tucking” of the pelvis, as a whole, for what is being suggested. In anatomical terms, the action can take place relative to the top of the upper leg bone, the femur bone.
When you “tip” the pelvis, this means you are rolling it forward and down over the head of the femur, in what is referred to in anatomical circles as anteversion or flexion at the hip joint. This happens to some extent in forward bending poses, like Uttanasana (Standing Forward Bend), when we roll the hips forward and down to initiate the forward bend.This movement also encourages the forward rounding of the lumbar vertebrae due to the effect of gravity, known as flexion of the lumbar spine, in the specific situation of Uttanasana. Yet we are also sometimes encouraged to extend the lower spine, as in a backbend, when entering into some forward bends. In other words, as the pelvis is rolling forward over the thighbones, we simultaneously extend the rest of the spine as in a backbend. This can be a useful suggestion in some lower back injury situations, or if you are focusing on strengthening the extensors of the back body. But it could be just as helpful in some cases, to allow the natural flexion of the lower back in Uttanasana accompany the anteversion of the pelvis.
![]() |
| Tipping the Pelvis (Uttanasana) |
![]() |
| Tucking the Pelvis (Backbend) |
And I have not even mentioned the movements that can happen between the pelvis and the sacrum, known as nutation and counternutation! Shari and I have written some about that elsewhere, so take a re-read of some of those posts (Friday Q&A: Trikonasana, Janu Sirsasana and the Sacrum and Yoga and the Sacrum if you are not familiar with these terms. Judith Lasater, in her book Yoga Body, has a discussion of what happens in regards to these two actions in forward and back bending poses. There is some controversy about how much nutation and counternutation actually take place in adults in yoga poses, but there is a lot of variability in how much “intra-pelvic” movement (between just the two pelvis bones and the sacrum bone) between individuals from my observations. It is always wise to get the opinion of an experienced teacher who can watch your body move in different poses to see where your fall in this regard.
I would also suggest that you directly ask your teacher to stop and demonstrate the actions of tucking so you can get a clearer idea of what he or she is talking about. Sometimes I find that without that clarity, I am just guessing as to what the teacher wants me to experience. And it would also be reasonable to ask why he or she feels this is important to experience. So, ask the how and the why when these sorts of instructions are creating more confusion than clarity, and rock that pelvis on.
Tuesday, June 18, 2013
Which Way Should Your Shoulder Blades Go?
by Baxter
Let’s talk about the shoulder blades today. Recently, while evaluating my newest batch of teacher trainees during their teaching intensive, I was surprised to hear the instructions to “move the shoulder blades toward the pelvis” when the arms were in the overhead position, such as in Urdhva Hastasana. I heard it in Warrior 1, in Utkatasana, in Downward-Facing Dog, and virtually anytime my young wards had the arms overhead. And I flinched each time they uttered it, which just about every one of them did for the four classes they taught. Without naming names, I should mention “always move your shoulder blades down your back” is an instruction that I have heard on many occasions from very experienced teachers. These trainees did not hear me utter such words, but I realized that some of their instructors were still using this outdated understanding. This is too simplistic, as it is not what actually needs to happen for healthy movement of the arms overhead and it can actually restrict the mobility of the shoulder joint for most students.
If you look at photos of Mr. Iyengar in the classic “Light on Yoga,” you can see that he is not doing that. His shoulder blades are clearly moving towards his arms, not away from them. (I refer you to the following plates: 12, 23, 42, 91 and 96.) So what is going on here, or more accurately, what is going on with the shoulder blades when the arms go overhead?
When your arms are hanging at your sides, your shoulder blades have several common ways they move: sliding upwards is called elevation, such as when you shrug your shoulders; sliding slightly downwards, called depression, like when you tug the bottom of a shirt downwards; sliding them apart or side ways, called protraction or abduction, like when you give yourself a hug; and squeezing them together called retraction or adduction, like when doing the Cobra with a doorknob.
In these four basic movements, the shoulder blades don’t rotate much. Instead, they slide around in the general way they sit on your back upper rib cage. But in addition to those movements, there are two more movements that require a bit more imagination on your part, since we can’t quite see what is going on under the skin and muscles. The first happens when you take your arms overhead, whether forward and up or out the sides and up. It is called upward rotation of the scapula. There is usually a bit of elevation of the entire shoulder blade from its neutral position, like in Mountain Pose, and a bit of protraction. But more noticeable is the out and up swing of the shoulder blade that allows for the greatest reach of the arms overhead.
The opposite action is required to get the arms back down to your sides, and is called downward rotation. It is likely that a bit of depression of the shoulder blade and retraction also accompanies this action.
My teacher Donald Moyer refers to the rotational movement of the shoulder blades as “traffic circles.” Depending on which way the arms are moving or how they are positioned on the body, the traffic around the outer edges of the circle will flow in one direction the other. As an example of how you might imagine this, you might start with your awareness at the lower tip of your right shoulder blade. You can likely reach around and feel this with your fingers of your left hand. When your arm goes overhead, the traffic flows up the outer edge, across the top edge from right to left, and down the inner edge back to the lower tip of the shoulder blade. You might have to imagine there is a central pivot point in the shoulder blade, and the traffic causes the shoulder blade to rotate around that point. Then the traffic flows in the opposite direction as the arm comes down to Mountain pose position.
You might be asking yourself if there are times when saying “move the shoulder blades down the back” would be appropriate? And the answer is yes. For instance, with new students who have hunched shoulder blades that are semi-permanently elevated and forward rounded, you might have to ask, show and encourage them to depress the shoulder blades in Mountain pose. I will keep a slight feeling of downward movement even as the arms approach the 90 degree mark, such as in Warrior 2 pose. In Warrior 2, there is a bit of upward rotation of the blades, but mostly protraction or widening away from the spine. The downward movement is helpful for those with the tendency to hike the shoulders in these lower arm positions.
But so what if you draw your shoulder blades down the back when they are overhead? What’s the big problem? Well, as your arms and shoulder blades swing up, the upper arm bone, the humerus, rolls slightly outwards, so as to have a better contact with the shoulder blade. If you then pull the “shoulder blades towards the pelvis”, the shoulder blades start to downwardly rotate, the arm bone pulls down with it, and the shoulder joint gets narrowed and pinched, meaning that the soft, non-bone structures can get pinched in an unhealthy way. I dislike demonstrating this “wrong” way of doing it for my students, because it quite literally pinches my gleno-humeral joint.
Having a clearer understanding of how the shoulder blades change positions on the rib cage will be very helpful to you as you try some of the shoulder openers we share with you because so many of them work more effectively if you encourage the upward rotation, protraction and elevation of the scapulae I have shared with you here today (see Featured Sequence: Opening Tight Shoulders and future posts about the individual poses).
Let’s talk about the shoulder blades today. Recently, while evaluating my newest batch of teacher trainees during their teaching intensive, I was surprised to hear the instructions to “move the shoulder blades toward the pelvis” when the arms were in the overhead position, such as in Urdhva Hastasana. I heard it in Warrior 1, in Utkatasana, in Downward-Facing Dog, and virtually anytime my young wards had the arms overhead. And I flinched each time they uttered it, which just about every one of them did for the four classes they taught. Without naming names, I should mention “always move your shoulder blades down your back” is an instruction that I have heard on many occasions from very experienced teachers. These trainees did not hear me utter such words, but I realized that some of their instructors were still using this outdated understanding. This is too simplistic, as it is not what actually needs to happen for healthy movement of the arms overhead and it can actually restrict the mobility of the shoulder joint for most students.
If you look at photos of Mr. Iyengar in the classic “Light on Yoga,” you can see that he is not doing that. His shoulder blades are clearly moving towards his arms, not away from them. (I refer you to the following plates: 12, 23, 42, 91 and 96.) So what is going on here, or more accurately, what is going on with the shoulder blades when the arms go overhead?
When your arms are hanging at your sides, your shoulder blades have several common ways they move: sliding upwards is called elevation, such as when you shrug your shoulders; sliding slightly downwards, called depression, like when you tug the bottom of a shirt downwards; sliding them apart or side ways, called protraction or abduction, like when you give yourself a hug; and squeezing them together called retraction or adduction, like when doing the Cobra with a doorknob.
| Shoulder Blade in Neutral (Mountain Pose) |
| Rotating Shoulder Blade |
My teacher Donald Moyer refers to the rotational movement of the shoulder blades as “traffic circles.” Depending on which way the arms are moving or how they are positioned on the body, the traffic around the outer edges of the circle will flow in one direction the other. As an example of how you might imagine this, you might start with your awareness at the lower tip of your right shoulder blade. You can likely reach around and feel this with your fingers of your left hand. When your arm goes overhead, the traffic flows up the outer edge, across the top edge from right to left, and down the inner edge back to the lower tip of the shoulder blade. You might have to imagine there is a central pivot point in the shoulder blade, and the traffic causes the shoulder blade to rotate around that point. Then the traffic flows in the opposite direction as the arm comes down to Mountain pose position.
You might be asking yourself if there are times when saying “move the shoulder blades down the back” would be appropriate? And the answer is yes. For instance, with new students who have hunched shoulder blades that are semi-permanently elevated and forward rounded, you might have to ask, show and encourage them to depress the shoulder blades in Mountain pose. I will keep a slight feeling of downward movement even as the arms approach the 90 degree mark, such as in Warrior 2 pose. In Warrior 2, there is a bit of upward rotation of the blades, but mostly protraction or widening away from the spine. The downward movement is helpful for those with the tendency to hike the shoulders in these lower arm positions.
But so what if you draw your shoulder blades down the back when they are overhead? What’s the big problem? Well, as your arms and shoulder blades swing up, the upper arm bone, the humerus, rolls slightly outwards, so as to have a better contact with the shoulder blade. If you then pull the “shoulder blades towards the pelvis”, the shoulder blades start to downwardly rotate, the arm bone pulls down with it, and the shoulder joint gets narrowed and pinched, meaning that the soft, non-bone structures can get pinched in an unhealthy way. I dislike demonstrating this “wrong” way of doing it for my students, because it quite literally pinches my gleno-humeral joint.
Having a clearer understanding of how the shoulder blades change positions on the rib cage will be very helpful to you as you try some of the shoulder openers we share with you because so many of them work more effectively if you encourage the upward rotation, protraction and elevation of the scapulae I have shared with you here today (see Featured Sequence: Opening Tight Shoulders and future posts about the individual poses).
Tuesday, June 11, 2013
Featured Sequence: Opening Tight Shoulders
by Baxter
As a follow-up to my post on Friday last week about tight shoulders (see Friday Q&A: Tight Shoulders), and with the stellar prelude that Nina provided you with yesterday (see Living Proof), I am excited to share with you a sequence of shoulder opening poses. You may notice that some of the poses presented today resemble but are not necessarily formal yoga asanas or poses. In modern yoga practice, teachers and home practitioners have found that there are many “warm-up” poses that are a great way to get the body ready for the more formal yoga poses that might require quite a bit of openness or strength in a particular area of the body.
In this sequence, you will be able to address limits to movement in the shoulder joint in several directions. For those with tight shoulders, we recommend that you do the poses for 60-90 seconds in order to set the stage for more permanent changes in mobility. I am going to let the pictures do most of the talking (thanks again to Erin Collom for her generous help!), and keep my written instructions to a minimum. We will likely revisit many of these poses down the road, and can fill in any gaps in your understanding at that time.
So, without further ado....
1. Arms Overhead with arms angled
Arms Overhead pose (Urdhva Hastasana) is a very common pose in all levels of practice, and is required for both Sun and Moon Salutes, so it is a good one to practice and, if necessary, modify, as shown here. The idea is to bring your arms slowly out to the sides and up and stop when you feel pain, significant stiffness or if the elbows start to bend. Do all the good stuff you would normally do in Mountain pose, and let it feel like the outer shoulder blades lift faster than the inner shoulder blades toward your arm bones.
2. Bear Hug
This is a modified way to work towards full Eagle pose arms. Try to reach around the sides of your upper arm bones, not over the top of your shoulders. Hold on where ever you can. Lift your elbows to parallel with floor, and push them slightly forward to create a stretch of the muscles located between the shoulder blades. You can invite your breath into that area to experience more stretch. Be sure to repeat the pose on the opposite side.
3. Modified Eagle pose arms
You saw this one last Friday (Friday Q&A: Tight Shoulders). When you bend your arm at the elbow, the stretch around the shoulder area changes from that of the Bear Hug. For some, it is much tighter. Keep the “Eagle arm” humerus bone parallel to the floor, chest broad, and use your other hand to gradually draw your elbow toward the opposite side of your chest. You can also push the Eagle arm elbow forward to increase the back stretch. Be sure to repeat the pose on the opposite side.
4. Arms Overhead at the wall
This is a variation of Arms Overhead pose. Facing the wall, stand about six inches from the wall facing with your arms overhead. If you are really tight in the shoulders, your arms may have to be angled as in pose 1. Come up onto the balls of the feet, sliding your hands a bit higher. Imagine you are gluing your hands as high up the wall as you can. Then, slowly begin to lower your heels to the floor while keeping your hands as high as possible. Be careful not to let your lower back dramatically arch as you descend your heels, but let it feel like the outer shoulder blades lift faster than the inner shoulder blades toward your arm bones. Keep your neck relaxed.
5. Half Arms Overhead at the wall
This is a great way to open up your side chest and armpit, areas that can limit your arms going overhead. Stand with your body sideways to the wall, with your inside foot about 6 inches from the wall and your outer hip resting against the wall. Take your arm overhead in line with your side body, palm to the wall. Come up onto the balls of the feet, sliding your hand a bit higher. Imagine you are gluing your hand as high up the wall as you can. Then, slowly begin to lower your heels to the floor while keeping your hand as high as possible. Monitor the arch of your lower back and keep the side of your neck relaxed. Repeat on the other side.
6. Arm out to the side and back with wall
This is a great way to lengthen part of the pectoralis major muscle that lies under the breast tissue. It is also a great prep for the next pose. Stand about a foot or foot and a half away from the wall, with the side of your body to the wall. Reach your arm back about a foot or so behind you, parallel with the floor, palm on the wall with fingers pointing away from you. Press your hand into the wall, and slowly and carefully turn the chest away from the arm until some stretch arises. Hold there. Skip this one if you have a history of dislocating your shoulder. Repeat on the other side.
7. Cobra with Doorknob
This is another way to address tightness in the front chest that limits your arms moving into extension behind your body. It is a bit more challenging than the last pose, since both arms are doing the action at the same time. Find a door with a good set of doorknobs on both sides of it, and then open the door slightly. Stand Stand a few inches in front of it, then reach back and grab onto the doorknobs. Keeping a nice lift up your front body, begin to lean forward. Try to keep the sensation happening in your upper chest, not the lower back. You will resemble the figurehead on the front of a 17th century ship.
8. Reclined Arms Overhead
This one comes from our teacher Donald Moyer. With a block next to you, and a strap that you have adjusted to a shoulder-width loop, lie down on your back in Savasana, but with strong legs. Place the strap over your arms just beyond your elbow joints towards your hands, then press out against the strap as you pick up the block between your hands and firm your hands against the ends of the block. You may have to make the loop bigger or smaller to keep your arms straight as you press on the block. Then, take your arms up and over head slowly, heading towards the wall behind you. If your thumbs don’t touch the floor without bending your elbows, you can put a lift of some sort, such as a folded blanket, under your hands. I put this pose at the end of the sequence as I feel that it requires the most openness and strength of the poses presented here. Nina, however, often does this at the start of a practice and finds it helpful in that position of the sequence.
As a follow-up to my post on Friday last week about tight shoulders (see Friday Q&A: Tight Shoulders), and with the stellar prelude that Nina provided you with yesterday (see Living Proof), I am excited to share with you a sequence of shoulder opening poses. You may notice that some of the poses presented today resemble but are not necessarily formal yoga asanas or poses. In modern yoga practice, teachers and home practitioners have found that there are many “warm-up” poses that are a great way to get the body ready for the more formal yoga poses that might require quite a bit of openness or strength in a particular area of the body.
In this sequence, you will be able to address limits to movement in the shoulder joint in several directions. For those with tight shoulders, we recommend that you do the poses for 60-90 seconds in order to set the stage for more permanent changes in mobility. I am going to let the pictures do most of the talking (thanks again to Erin Collom for her generous help!), and keep my written instructions to a minimum. We will likely revisit many of these poses down the road, and can fill in any gaps in your understanding at that time.
So, without further ado....
1. Arms Overhead with arms angled
Arms Overhead pose (Urdhva Hastasana) is a very common pose in all levels of practice, and is required for both Sun and Moon Salutes, so it is a good one to practice and, if necessary, modify, as shown here. The idea is to bring your arms slowly out to the sides and up and stop when you feel pain, significant stiffness or if the elbows start to bend. Do all the good stuff you would normally do in Mountain pose, and let it feel like the outer shoulder blades lift faster than the inner shoulder blades toward your arm bones.
2. Bear Hug
This is a modified way to work towards full Eagle pose arms. Try to reach around the sides of your upper arm bones, not over the top of your shoulders. Hold on where ever you can. Lift your elbows to parallel with floor, and push them slightly forward to create a stretch of the muscles located between the shoulder blades. You can invite your breath into that area to experience more stretch. Be sure to repeat the pose on the opposite side.
3. Modified Eagle pose arms
You saw this one last Friday (Friday Q&A: Tight Shoulders). When you bend your arm at the elbow, the stretch around the shoulder area changes from that of the Bear Hug. For some, it is much tighter. Keep the “Eagle arm” humerus bone parallel to the floor, chest broad, and use your other hand to gradually draw your elbow toward the opposite side of your chest. You can also push the Eagle arm elbow forward to increase the back stretch. Be sure to repeat the pose on the opposite side.
4. Arms Overhead at the wall
This is a variation of Arms Overhead pose. Facing the wall, stand about six inches from the wall facing with your arms overhead. If you are really tight in the shoulders, your arms may have to be angled as in pose 1. Come up onto the balls of the feet, sliding your hands a bit higher. Imagine you are gluing your hands as high up the wall as you can. Then, slowly begin to lower your heels to the floor while keeping your hands as high as possible. Be careful not to let your lower back dramatically arch as you descend your heels, but let it feel like the outer shoulder blades lift faster than the inner shoulder blades toward your arm bones. Keep your neck relaxed.
5. Half Arms Overhead at the wall
This is a great way to open up your side chest and armpit, areas that can limit your arms going overhead. Stand with your body sideways to the wall, with your inside foot about 6 inches from the wall and your outer hip resting against the wall. Take your arm overhead in line with your side body, palm to the wall. Come up onto the balls of the feet, sliding your hand a bit higher. Imagine you are gluing your hand as high up the wall as you can. Then, slowly begin to lower your heels to the floor while keeping your hand as high as possible. Monitor the arch of your lower back and keep the side of your neck relaxed. Repeat on the other side.
6. Arm out to the side and back with wall
This is a great way to lengthen part of the pectoralis major muscle that lies under the breast tissue. It is also a great prep for the next pose. Stand about a foot or foot and a half away from the wall, with the side of your body to the wall. Reach your arm back about a foot or so behind you, parallel with the floor, palm on the wall with fingers pointing away from you. Press your hand into the wall, and slowly and carefully turn the chest away from the arm until some stretch arises. Hold there. Skip this one if you have a history of dislocating your shoulder. Repeat on the other side.
7. Cobra with Doorknob
![]() |
| Tight Shoulder Version |
![]() |
| More Flexible Version |
This one comes from our teacher Donald Moyer. With a block next to you, and a strap that you have adjusted to a shoulder-width loop, lie down on your back in Savasana, but with strong legs. Place the strap over your arms just beyond your elbow joints towards your hands, then press out against the strap as you pick up the block between your hands and firm your hands against the ends of the block. You may have to make the loop bigger or smaller to keep your arms straight as you press on the block. Then, take your arms up and over head slowly, heading towards the wall behind you. If your thumbs don’t touch the floor without bending your elbows, you can put a lift of some sort, such as a folded blanket, under your hands. I put this pose at the end of the sequence as I feel that it requires the most openness and strength of the poses presented here. Nina, however, often does this at the start of a practice and finds it helpful in that position of the sequence.
Tuesday, June 4, 2013
Parallel or Not: Aligning Your Feet
by Baxter
I received this inquiry from one of our regular readers recently:
One of the things I am noticing is, as much as I try, I can't seem to keep my feet parallel in mountain pose or to begin a flow without constantly looking down and re-aligning them. I'm wondering if this is something I should give up on (keeping my feet straight) or just let them splay a bit and not sweat the notion of my feet alignment looking like my instructors. I'm wondering if my body is simply built this way and I'm trying to get the proverbial square peg in a round hole. I am also wondering if this impacts balancing poses since I try to keep my feet parallel with the edge of the mat and I seem to be fighting stability for foot position.
Thoughts welcomed if this makes sense or maybe, just maybe I answered my own question about foot position?
This is a perfect question for this week, as I am thinking a lot about feet this week, as I am teaching my annual Yoga for Healthy Feet workshop here in Oakland on Saturday. And our reader’s observations about his feet are not uncommon. Lots of yoga students, when confronted with the request by their teachers to “parallel” their feet find this quite challenging and sometimes downright impossible. It can feel odd or uncomfortable to stand this way.
There are many reasons for this. A common one that shows up in yoga class are ex-dancers who were taught from a very young age to emphasize a turn out of the entire leg from hip joint to feet, as the classical ballet position of the legs. They develop a “functional” turn out, one that was not present at birth, but develops as a result of a habitual way of moving. We see a similar condition in functional scoliosis, where the thoracic spine becomes bent and twisted as a result of some repeated activity, such as carrying an infant on the same hip all the time, or always swinging a hammer with the same arm.
In addition to functional changes in foot and leg alignment, trauma can result in such troubles, especially an injury like a broken bone that does not set in its original alignment as it heals. And then there are genetic expressions of the skeleton in the lower extremities that you see running through family lines, either with the feet or shins turning out, which we sometimes call duck feet, or turning in, which is referred to as pigeon toed. Genetic patterns in the hip joints, thigh bones, knee joints, shin bones and ankles can also affect the alignment of the feet.
And keep in mind that, except for disciplines like yoga, martial arts, dance and such, most of us don’t pay a great deal of attention to our feet being aligned parallel, as in yoga. And many non-yogis who don’t concern themselves with such things have wonderful, happy lives. So some of this is kind of arbitrary, and not always essential for a healthy life. But this foot position might be essential in performing well in certain yoga asanas, like Half Moon pose (Arda Chandrasana), where you have to balance on one foot and leg with only one hand on the floor to help you.
There are also inspirational stories of modern yoga practitioners, like that of Muktananda Stiles, who reported being bow legged, and with specific guidance from an experienced yoga teacher (in his case BKS Iyengar), reversed this to symmetric legs and feet.
So, let’s suppose for a moment that being able to stand with your feet parallel does confer some benefit to your posture and your musculoskeletal health. How would you go about assessing and changing what needs to change? You’ll want to do a self-assessment of your lower extremities or have a friend or teacher do one with you, as sometimes others will see something you do not. Some things to look at: Are your thighs parallel, knees caps straight ahead, but shin bones turning out and the feet go along for the ride? Also, look at whether both feet turn out or in the same amount, or if it seems to be a one-sided thing. You might have your teacher look at your hip joints as a source of foot turn out, like in our dancer example, or the knee joint, or the shins. Also, do the feet have high or flat arches at play that could also affect your efforts at symmetry?
Once you have some idea of what could be contributing to your particular asymmetry, a clearer path of action may present itself. One way my colleague and friend Richard Rosen has of working on the thighs generally (as they contribute to the effect on the feet) is to use a block between the mid-thighs to activate the adductor muscles of the upper legs, which are often loose and weak for many of us and can contribute to supination of the feet, where we tend to roll onto the outer edge of the foot. Simultaneously, you can place a strap around the outer mid-thighs and cinch it firm, so you can squeeze the block while also pushing out against the strap. This may seem like a paradox, but play with it and see what you discover.
For those with tight outer hips, which could also contribute to rolling onto the outer edge of the feet, the strap can bring you back to even. For those with pronation of feet, where you tend to collapse onto the inner foot, the outer press on the strap can get you more toward the outer foot.
The other things to consider are that if you want to get the musculoskeletal system to change, you will have to practice regularly and give it some time to take effect. As we have mentioned elsewhere, the bones of the body can remodel as they respond to new stresses placed on them, as in osteoporosis. So we can take advantage of that fact here.
It may also turn out that after careful evaluation you realize or decide that your feet and legs are better off, in the big picture of things, staying as they are. In that case, you may have to be more creative about how you modify certain poses, such as balancing poses, to take your unique anatomy into account. In either case, you will have an interesting focus for your mind as you explore this common alignment recommendation in your public yoga classes!
I received this inquiry from one of our regular readers recently:
One of the things I am noticing is, as much as I try, I can't seem to keep my feet parallel in mountain pose or to begin a flow without constantly looking down and re-aligning them. I'm wondering if this is something I should give up on (keeping my feet straight) or just let them splay a bit and not sweat the notion of my feet alignment looking like my instructors. I'm wondering if my body is simply built this way and I'm trying to get the proverbial square peg in a round hole. I am also wondering if this impacts balancing poses since I try to keep my feet parallel with the edge of the mat and I seem to be fighting stability for foot position.
Thoughts welcomed if this makes sense or maybe, just maybe I answered my own question about foot position?
This is a perfect question for this week, as I am thinking a lot about feet this week, as I am teaching my annual Yoga for Healthy Feet workshop here in Oakland on Saturday. And our reader’s observations about his feet are not uncommon. Lots of yoga students, when confronted with the request by their teachers to “parallel” their feet find this quite challenging and sometimes downright impossible. It can feel odd or uncomfortable to stand this way.
There are many reasons for this. A common one that shows up in yoga class are ex-dancers who were taught from a very young age to emphasize a turn out of the entire leg from hip joint to feet, as the classical ballet position of the legs. They develop a “functional” turn out, one that was not present at birth, but develops as a result of a habitual way of moving. We see a similar condition in functional scoliosis, where the thoracic spine becomes bent and twisted as a result of some repeated activity, such as carrying an infant on the same hip all the time, or always swinging a hammer with the same arm.
In addition to functional changes in foot and leg alignment, trauma can result in such troubles, especially an injury like a broken bone that does not set in its original alignment as it heals. And then there are genetic expressions of the skeleton in the lower extremities that you see running through family lines, either with the feet or shins turning out, which we sometimes call duck feet, or turning in, which is referred to as pigeon toed. Genetic patterns in the hip joints, thigh bones, knee joints, shin bones and ankles can also affect the alignment of the feet.
And keep in mind that, except for disciplines like yoga, martial arts, dance and such, most of us don’t pay a great deal of attention to our feet being aligned parallel, as in yoga. And many non-yogis who don’t concern themselves with such things have wonderful, happy lives. So some of this is kind of arbitrary, and not always essential for a healthy life. But this foot position might be essential in performing well in certain yoga asanas, like Half Moon pose (Arda Chandrasana), where you have to balance on one foot and leg with only one hand on the floor to help you.
There are also inspirational stories of modern yoga practitioners, like that of Muktananda Stiles, who reported being bow legged, and with specific guidance from an experienced yoga teacher (in his case BKS Iyengar), reversed this to symmetric legs and feet.
So, let’s suppose for a moment that being able to stand with your feet parallel does confer some benefit to your posture and your musculoskeletal health. How would you go about assessing and changing what needs to change? You’ll want to do a self-assessment of your lower extremities or have a friend or teacher do one with you, as sometimes others will see something you do not. Some things to look at: Are your thighs parallel, knees caps straight ahead, but shin bones turning out and the feet go along for the ride? Also, look at whether both feet turn out or in the same amount, or if it seems to be a one-sided thing. You might have your teacher look at your hip joints as a source of foot turn out, like in our dancer example, or the knee joint, or the shins. Also, do the feet have high or flat arches at play that could also affect your efforts at symmetry?
Once you have some idea of what could be contributing to your particular asymmetry, a clearer path of action may present itself. One way my colleague and friend Richard Rosen has of working on the thighs generally (as they contribute to the effect on the feet) is to use a block between the mid-thighs to activate the adductor muscles of the upper legs, which are often loose and weak for many of us and can contribute to supination of the feet, where we tend to roll onto the outer edge of the foot. Simultaneously, you can place a strap around the outer mid-thighs and cinch it firm, so you can squeeze the block while also pushing out against the strap. This may seem like a paradox, but play with it and see what you discover.
For those with tight outer hips, which could also contribute to rolling onto the outer edge of the feet, the strap can bring you back to even. For those with pronation of feet, where you tend to collapse onto the inner foot, the outer press on the strap can get you more toward the outer foot.
The other things to consider are that if you want to get the musculoskeletal system to change, you will have to practice regularly and give it some time to take effect. As we have mentioned elsewhere, the bones of the body can remodel as they respond to new stresses placed on them, as in osteoporosis. So we can take advantage of that fact here.
It may also turn out that after careful evaluation you realize or decide that your feet and legs are better off, in the big picture of things, staying as they are. In that case, you may have to be more creative about how you modify certain poses, such as balancing poses, to take your unique anatomy into account. In either case, you will have an interesting focus for your mind as you explore this common alignment recommendation in your public yoga classes!
Subscribe to:
Posts (Atom)