Pages

Labels

12th anniversary 21st Amendment Monk's Blood Abbaye De Saint Bon Chien abhyasa abuse abyss active vs. passive poses acute pain agility agitated depression ahimsa Al-Aksir alasya ale alesmith alignment Allagash anatomy Anchor Brewing Anchor Brewing Company anchor steam Anchor Steam Brewing and moderation Andrea Gilats Angel's Share anger ankle circles ankle injuries ankle joint ankle problems ankle sprains anti-aging solution anxiety aparigraha appetite arm pain arm strength arms arthralgia arthritis arthritis (menopause) arthritis of shoulder joint atrial fibrillation avery avery maharaja award winning beer store ayurveda B.K. Bose baba back care back extensor muscles back pain balance Ballast Point baltic thunder bandhas bandwagon of healthy eating baroreceptors basque cider Baxter Baxter Bell bay area beer beer beer advocate beer castro beer club beer club san francisco beer list Beer of the Month beer of the month club beer pong beer shop san francisco beer store Belgian beer belgian beer glasses belgian beer san francisco Belgium. Japanese best beer store in the world BFM Bhagavad Gita Bhramari Bikram Choudhury biological clock Birra Troll Birrifio bitches brew Bittersweet Lenny black butte black lager blood lactate blood pressure body image bone strength Bonnie Maeda bottle bag bourbon Brad Gibson brain strength Brasserie Caracole breath breath practices Brettanomyces Beer Brewing Bridge pose Bridget Frederick Bruery Coton Bruery Mischief Bruery Saison De Lente bruising Brussels Bruton beer bursitis bypass surgery California beer Callifornia beer caloric restriction Cantillon cantillon san francisco Carol Krucoff cascade apricot cascade sang rouge cask strength sake Castro Cat pose Cat-Cow pose cataracts central nervous system cervical nerves Chair Cat pose Chair Downward-Facing Dog pose Chair Purvottansana chair yoga chair yoga sequence challenging pose charlie papazian chatoe rogue cheese Child's pose children Chimay chimay san francisco chocolate indulgence chondromalacia christmas beer chronic illness chronic inflammation chronic pain chronic stress cognitive decline cognitive health collapsed lung commenting comments community community yoga compassion compression of joints connective tissue conscious relaxation contacting writers contentment cortisol counter-poses Cow pose craft beer craft beer san francisco craft beer store craft brew creaky knees Cucapa Barley wine Cuvee de Tomme Cuvee des Champions Damnation dave hauslein david hausein David Hauslein Dayna Macy De Dolle De Proef De Ranke Dead Guy Ale Decadence Pomegranite Saison Decadent Evil degenerative disc disease dementia dental disease depression Depuceleuse san francisco DFH Faithful Ale DFH Twenty dharana dhyana dhyanam diabetes diet digestion digestive disorders digestive system dogfish head Dogfish Head Theobroma Dolphin pose dominus vibiscum doshas double ipa Downward-Facing Dog pose Downward-Facing Dog pose (variations) drake's denogginizer Drie Fontinen duck feet Eagle pose Easy Inverted Pose eating habits eating healthy Einbecker El Camino (un) real emotional wellbeing endorphins endurance training enteric brain equanimity eric's ale European Society of Cardiology exercise extensor muscles eye floaters eye problems facebook beer Fantome fatigue feet felt real happiness fifty fifty brewing company Firestone Walker first growth first trimester fizzy yoga Flanders flat feet Flemish Primitive flemish sour ale flexibility Food pyramid guide forehead skin forward bends fred echardt front body frozen shoulder full sail topsail fun gait Gandhi ganglion cysts Garudasana genetics Georg Feuerstein George Gale ginjo Gonzo goose island goose island san francisco Goouden Carolus gouden carolus Grand Cru greed grief grow your own Gueuze gueuze girardin Haandbryggeriet hakutsuru Halasana (supported) hands Handstand Hanssens lambic happiness hard cider head position head rush headaches health care professionals healthy aging healthy eating Healthy Eating Ideas healthy spirits healthy spirits Mikkeller 1000 IBU healthy spirits san francisco healthy spirits. Deschutes Jubel Ale 2010 healthy spirits. san francisco healthy spirits. san francisco beer healthy spriits healthy style of eating heart problems Hedonist Beer Jive herbs hernias high blood pressure himsa Hinduism hip arthritis hip dysplasia hip replacements history of yoga Hitachino Nest Hitachino XH hoarding home brew home practice home yoga practice hop wallop Howe Sound Hugh Malone hummus hypertension hypotension ida immune system inflammation inguinal hernias injuries insomnia Inverted Lake pose Irritable Bowel Syndrome Jalandara Bandha Japanese beer jatharagni jay hinman jizake John John joint health joint pain joint replacement joints Jolly Pumpkin Jon Kabat-Zinn Judith Lasater kampai karma yoga karuna Kausthub Desikachar kidney kleshas knee alignment knee joint knee pain knee replacement Koningshoeven Krishnamacharya Krishnmacharya kundalini lactic acid lager Lambic large women leg cramps leg length discrepancy (LLD) Legs Up the Wall pose life coaching Life Coaching Executives Life coaching problems ligaments lips of faith longevity Lost Abbey Lost Abbey Brewing Company low back low back pain low blood pressure Luciernaga Lucifer lying male hormones male menopause malnutrition Man Bites Downward-Facing Dog marijuana marin brewing barrel aged old dipsea massage medical advice medical conditions (informing teacher of) medical conditions (yoga for) meditation Melina Meza Melitta Rorty men menopause mental health Mephistopholes micro brew micro-brew middle-eastern Midnight Sessions Lager Midnight sun brewing midnight sun hop dog midnight sun san francisco migraines Mikkeller Mikkeller Beer Geek Breakfast Mikkeller Black Mikkeller chipotle porter mind-body connection mindful yoga mindfulness mini office yoga sequence mini yoga practices miracle mission statement mood Morton's Neuroma motivation Mountain pose Multiple Sclerosis Muriel Zimmerman music nadis napa smith nate breed neck anatomy neck pain neuroma neuropsychiatric disorders new arrivals new belgium new releases nigori Nina Zolotow Niroga Institute noble pils nocturnal leg cramps Nogne-O non-hoarding non-violence Norwegian beer nutrient-dense foods oak aged oak aged ale oatmeal stout Odonata Rorie's Ale odonata saison office yoga Old Inventory Barleywine ommegang Ommegeddon oral hygiene Orval osteoarthritis osteopenia osteoporosis Oyster Stout pain pain management parabola partner yoga Paschima Namaskarana Paschimottanasana passive vs. active poses Patricia Walden Paul Grilley peanuts Pearl Jam Pearl Jam Beer pelvis perimenopause pes planus philosophy physio-yoga pigeon toes pingula pinto plantar fascitis Pliny the Elder Pliny the Younger Plow pose (supported) pneumothorax Port Brewing postural control posture Powerful pose practice practice (changing your) prana prana vayu pranayama pratipaksha bhavanam pregnancy private lessons proprioception psoas Puppy pose purusathas Purvottanasana Purvottansansa quadruppel questions R. Sriram Ram Rao rami barqawi Rami's Mommy's range of motion (ROM) rate beer ratebeer real ale Reclined Cobbler's pose red lentils Redemption relaxation Relaxation pose relaxation response religion (and yoga) resistance training resting restless leg syndrome restorative backbend restorative yoga retreats Reverse Prayer pose Richard Rosen Rodenbach barrel 230 Rogue Brewery Russian River Russian River Sanctification sacroiliac joint sacrum sacrum (anatomy of) safety saint somewhere saison Saison Du BUFF sake Salvation samana vayu samaranth san francisco san francisco Beer San Francisco beer store San Francisco Beer Week san francisco bottle shop san francisco craft brew san francisco fantome san francisco odonata santosha Sarah Powers Sarvangasana (supported) satya saucha Savasana scalene muscles scar tissue Schaerbeekse Kriek Schlenkerla Ur-Bock Schneider scientific studies Sculpin sedentary behavior Seedstore seniors sequencing Setu Bandha Shari Ser shochu shoulder blades shoulder joint (arthritis of) shoulder joint replacement shoulders shoulders. sequences Shoulderstand (supported) sierra nevada sierra nevada 30th anniversary Signature Ale sitting-rising sleep smiling soy speedway stout spiritual health spiritual wellness split peas squatting steenbrugge stem cell regeneration stillwater Stone stone brewing company stopping yoga practice store hours beer strength stress stress management stress response Stretching stroke strong cheese styana suffering Sukasana supplements Supplication Supported Child's Pose Supported Forward Bend Supta Badha Konasana surgery sushumna nadi Swiss beer Table pose tabouli Tadasana teacher (choosing) teachers teaching seniors Temptation testosterone Thanksgiving Thanksgiving Day Schedule The abyys san francisco The Bruery Thoracic Outlet Syndrome Thoreau tilting the pelvis timing poses Timothy McCall top sail toronado total knee replacement towards healing and finding the solution transferring transitions trappist trauma trial run coaching session truth tucking the pelvis TV Twilight and Life Coaching ujjayi breath unfiltered sake unibroue Upavista Konasana upper body flexibility upper body strength Upward Plank pose Upward-Facing Plank pose urthel Utkatasana val dieu Valley Brewing Company variety vata vayu vegetarian way vertical epic vestibular system victory Victory at Sea viloma breath vintage beer violence Viparita Karani vyana vayu Warrior 1 Warrior 2 pose Warrior 3 wedge weight loss weight management wild ale wild devil will power William Broad workshops wrist problems wrists wu tang clan xyauyu yamas Yin Yoga yoga history Yoga Journal conference yoga nidra yoga philosophy yoga sutras yoga therapy yogic breathing yogic phases of life yulesmith summer

Friday, June 28, 2013

Friday Q&A: Alignment of the Knees

Q:  Here is a question for you.  I was practicing Utkatasana Tuesday and as I sat down into the pose I got a twinge in my inner left knee.  (Slightly forward of the seam line, between the upper and lower leg bones.) I straightened up and repeated the pose squeezing a block between my knees. The little pain was gone. How did squeezing a block between my knees change the alignment of the knee?
A:  Utkatasana, mistakenly called “Chair Pose” by some, comes from the Sanskrit root word utkata, which Richard Rosen defines as “exceeding the usual measure, immense, gigantic; richly endowed with, abounding in; drunk, mad, furious; excessive, much; superior, high, proud, haughty; uneven; difficult” (from his book Original Yoga ).  If you have spent any time in this pose, you can certainly get behind the difficult part, but we try to avoid it feeling uneven. (We like to call it "Powerful pose.")

Whenever you have pain in a joint in a yoga pose, look not only to that joint, but also one or two joints above or below that one as you look for an explanation of your pain. Not being able to see our questioner in person, it is hard to say why the pain showed up in the first variation, but any time you are standing and bearing weight on your legs, and you bend the knee joint, there is the potential to compress the joint in an uneven fashion that could result in pain. As I have discussed elsewhere regarding arthritic joints and creating space in the joint, creating a feeling of lift of the femur bone (the upper leg bone) away from the lower leg bones is always a good starting place to see if you can eliminate the pain.

In this situation, placing a block between the thighs and squeezing has many effects, any one of which could have alleviated the knee pain. Squeezing the blocks may change the way the feet are aligned, as they may come closer together, and the weight might shift more towards the inner foot. So, if the feet were the underlying cause of the knee pain, the block squeeze could re-balance the feet.  When looking at the knees, if someone is a bit knock-kneed, with the knees dropping toward one another, the block could move the knees outwards slightly and make more space in the outer knee joint and bring the inner knee joint closer together. If the knees are a bit bow legged, the block squeeze could bring the knees closer together, opening the inner knee joint and narrowing the outer knee joint.  Again, these shifts could alleviate pain in the pose.

If the inner thigh muscles are weak, the squeeze of the block is going to contract them more actively using the five adductor muscles, and this could bring the vertical alignment of the thigh bones back towards even if one is bowing or sagging in or out through the femur bones. And if the outer buttock and hip muscles are really tight and pull legs apart or tend to roll the femurs out a bit into external rotation at the hip joint, the squeeze of the block could help internally rotate the thigh bones to help them adduct a bit closer together, resulting in better alignment at the knee joint. Finally, the block also can activate the quadriceps muscle that tends to be weakest, the vastus medialis (which I believe is discussed in one of my earlier posts on knees). This can help balance out the stronger vastus lateralis, which would tend to pull the femur to the side and roll it out a bit at the knee.

And although this list of possible effects of blocks between the knees is not exhaustive, as you can see there are many potential impacts that could have led to the disappearance of your knee pain.

If you have pain in Utkatasana every time you do it without the block, I’d suggest you use the block regularly for a while, then try it without the block, but with the same alignment and muscle work that you feel when the block is in place. Hopefully this will resolve any pain in this pose, which is one of the original asana that Richard Rosen identifies in his book. He has other useful suggestions for Utkatasana in that book, which is a must-read for any yoga enthusiast!

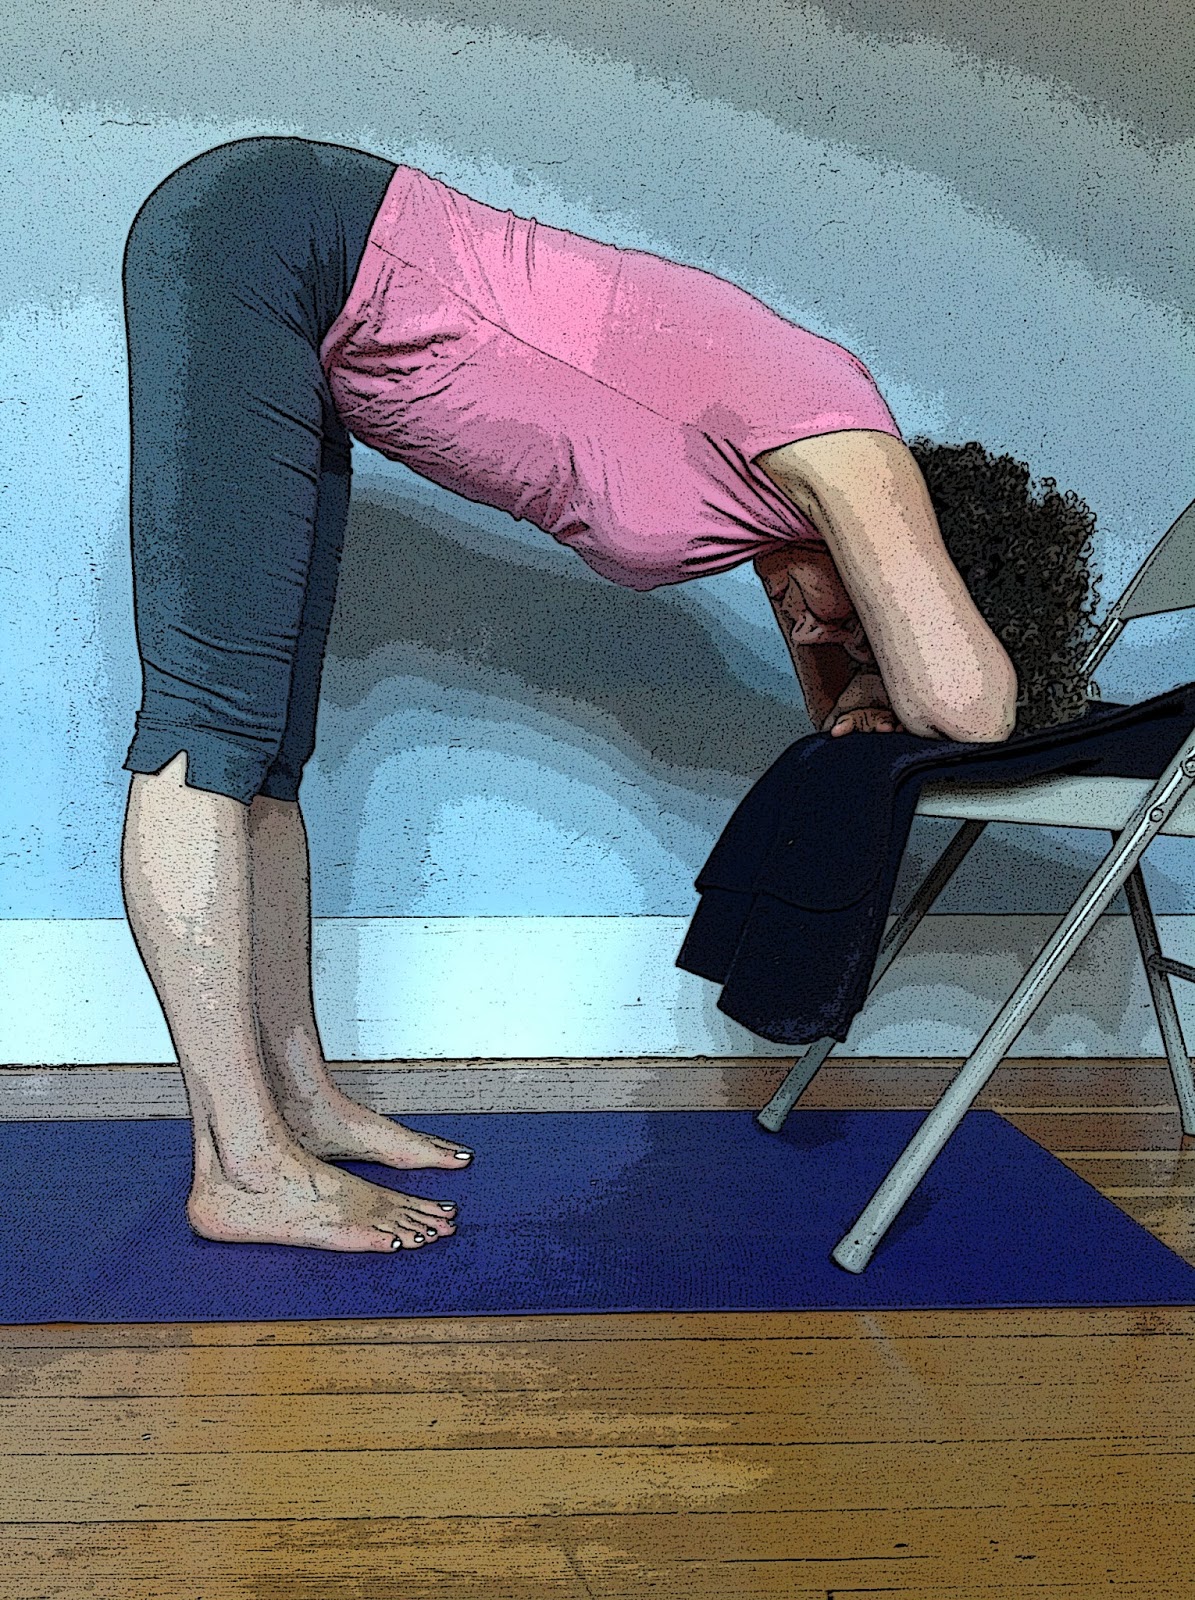
See Featured Pose: Powerful Pose (Utkatasana) for our instructions on how to do this pose.

—Baxter

Thursday, June 27, 2013

Featured Pose: Legs Up the Wall Pose (Viparita Karani)

by Baxter and Nina

Viparita Karani, often called Legs Up the Wall pose (a more accurate name is Inverted Lake pose), is one of our very favorite poses. Because this pose is a supported inversion, it triggers the relaxation response (see The Relaxation Response and Yoga). It is also comfortable for most people, and the support of the wall allows you to stay in the pose for a good long while, making it a perfect pose for stress reduction or pacifying an over-active nervous system. In fact, this is Nina’s go-to pose for challenging times. It can be practiced on it its own, as part of restorative or supported inversion sequence, or as an emotional counter-pose at the end of any other kind of sequence.

This pose also stretches your leg muscles using gravity, so it’s a wonderful antidote to taking a long hike and, if you’re struggling with tight hamstrings, it’s a great way to passively let your leg muscles lengthen without engaging the front leg muscles.  And it is a perfect solution for swollen feet and/or ankles (a not uncommon occurrence in summer time or for those on their feet all day long).

We’re showing two different types of propping for the pose: a bolster under the pelvis and a folded blanket under the pelvis. Using the bolster lifts your pelvis higher, creating more of an inversion and thereby making it more effective for stress reduction. However, some people find the bolster irritates their lower backs. In this case, it’s best to use a folded blanket under your pelvis instead. And, of course, not everyone has a bolster so you may need to use blankets for that reason (see Making Your Own Yoga Props). If both versions are irritating to you for any reason, you can try scooting your hips gradually a bit further away from the wall, in order to find your personal sweet spot.  If you move too far out, you run the risk of hyper-extending your knees and getting some knee discomfort. So stay mindful of this as you tinker to get it just right. And if you can’t find a sweet spot, you can try the pose flat on your back, without a prop under your pelvis.

If none of these versions make you happy—some people with tight hamstrings just can’t get comfortable—try the version with your legs bent and resting on a chair (see Easy Inverted Pose).

If your legs fall asleep while you’re in the pose (that doesn’t usually happen until after at least 10 minutes, try slightly bending your knees for a minute or so. If you then restraighten your knees, you may find the tingling feeling stays away for a while. Alternatively, it may be a sign that it is time for you to come out of the pose.

Baxter prescribes this pose for:

•    leg fatigue
•    peripheral edema (swelling of feet and legs)
•    low back pain
•    foot pain
•    recovery from ankle sprains or plantar fasciitis
•    stress management
•    soothing yourself when you are anxious or agitated

Instructions:


1. Setting Up Your Props. Although we don’t show it, if the room is not carpeted, you might want to set up a yoga mat with the short end at the wall, to provide a little cushioning for your body. Then, depending on the height you want under your pelvis, place just your bolster, a stack of one or two blankets folded into rectangles, or a bolster on top of a folded blanket parallel to the wall but at least six inches away from the wall. It is important to place the prop at least six inches away from the wall and not next to it, otherwise, you will slide off the prop when you go into the pose! Then, if you want a blanket under your head and spine, place a single blanket folded into a rectangle perpendicular to the bolster. 

2. Getting Up into the Pose. For some reason, this is a little tricky for beginners, but once you get used to it, going in and out of this pose becomes second nature. Start by sitting at one end of the prop, with your side to the wall, and your hips touching the wall. Then, placing your hands on the floor or bolster to steady yourself, swing your legs up onto the wall and lie back on the floor.


At this point, you may need to scoot your buttocks a bit toward the wall, so hold onto the bolster as you do so to keep it from moving. Ideally, your tailbone should be hanging just off the bolster so your lower back is nicely curved, but if this is uncomfortable for you, try scooting your pelvis back until you find your sweet spot.

From here, place your arms alongside your body, out to the sides or in a cactus position (like a sleeping baby).

3. Being In the Pose. As you relax in the pose with your eyes closed, either keep your legs together and lightly active or, if your heels don’t slip down the wall when you do so, try relaxing your legs, allowing them to turn out a bit. Experiment to see which version is more comfortable for you. Alternatively, you can tie a strap around your thighs, just above the knees, to keep your legs together without effort. If you have an eye pillow or silk scarf, that can help enhance your relaxation. To feel the full effects of the pose, stay for at least 10 minutes (Nina often stays for 15 to 20 minutes), though, of course, shorter periods are also beneficial.

4. Coming Out of the Pose.
When you are ready to come out, bend your knees and place the soles of your feet on the wall. Then, either use your feet to push yourself away from the wall and off the prop (and then slowly roll over onto your side before coming up to sitting) or slowly roll off the prop onto your side. On your side, take a couple of deep breaths, and then use your hands to slowly come up to a seated position (moving quickly will stimulate your nervous system).

Cautions: For those with low back pain, make sure to set up your props so you are entirely comfortable. If that means coming out of the pose and rearranging your props, go ahead and do it. This pose should not be painful; if it is, come out and do the bent leg version, which we call Easy Inverted pose.

If you have uncontrolled high blood pressure, do Easy Inverted pose instead. If your blood pressure is controlled, you can give the full pose a try. However, if Legs Up the Wall does not feel good for you, err on the side of caution and practice Easy Inverted pose instead.

Wednesday, June 26, 2013

Healthy Spirits: New at CASTRO


New at Castro:

1. La Guillotine Strong Blonde Ale

2 .Strand Brewing Atticus IPA

3. Deschutes Fresh Squeezed IPA

4. Ninkasi Babylon Double IPA

Balancing Your Emotional Body With Counter-Poses

by Nina

Last week in my posts about anxiety Anxiety, Yoga and the Front Body and Soothing Yourself With Supported Forward Bends, I discussed yoga poses to rely on when you’re feeling anxious (supported inversions and forward bends) and yoga poses to avoid when you’re in that state (backbends, twists, and Sun Salutations).

It makes sense if you’re in a crisis period to practice the poses that calm you down and avoid stimulating poses that might exacerbate your condition. However, if you’re in a state of chronic anxiety, avoiding backbends, twists, and many of the active poses for a long period of time will move your body toward imbalance. The same is true if your practice is focused on any emotion-based condition, such as agitated depression, clinical depression, or even just chronic stress.

In this case, I feel it is better to return to a more well-rounded yoga practice (see A Week of Yoga Practice) but consider how you end your practices. By choosing an appropriate counter-pose to end your practice, you can counteract any negative emotional effects of your practice without negating the beneficial physical ones. That way, you can move on to the rest of your day with your nervous system and emotions more in balance. Some people with anxiety or agitated depression even find that beginning with a very active practice can help burn off excess energy, which makes the soothing or relaxing counter-poses at the end of the sequence more effective (or even possible, as it can be hard to stay still when you’re feeling very anxious).

My post Yoga and Your Emotions describes the emotional effects different types of poses have on most people. So if you’re interested in practicing for balancing your emotions, take a look at that and consider how a given practice (standing pose, Sun Salutation, twist, backbend, forward bend, restorative) might affect your current emotional state. Then choose one or more counter-poses—especially passive poses that can be held for long periods of time—that you can add on to the end of your practice to counteract the poses that were the main focus of the practice. For example, if you’re already feeling anxious or hyper yet need to practice backbends for the health of your body, you can end your backbend sequence with a long supported inversion, such as a Chair Shoulderstand or Legs Up the Wall pose, to calm yourself down. 

Anxiety and Agitated Depression. We’ve already said that supported inverted poses and supported forward bends are the best poses to counteract anxiety. These may also be helpful for agitated depression as that is anxiety based. So at the end of a more active sequence, try resting in Supported Child’s pose for a few minutes and then practice Legs Up the Wall pose (Viparita Karani) for 10 minutes or more. If Child’s pose is uncomfortable for you or you can’t kneel for some reason, try a Supported Seated Forward Bend with a chair (see Soothing Yourself With Supported Forward Bends), with a straight back. If Legs Up the Wall pose doesn’t work well for you, try Easy Inverted Pose (Featured Pose: Easy Inverted Pose). If having your front body exposed makes you feel vulnerable, try covering yourself with a blanket. 

Clinical Depression. On the other hand, for people who are suffering from clinical depression, forward bends, with their inward turning quality, can cause you to brood. For you, therefore, a couple of mild, active backbends, such as Purvottanasana (Reverse Plank pose) or Bridge pose, would be good counter poses after practicing a forward bend sequence. Generally speaking, an active practice is best for those with clinical depression, especially one that includes backbends, because that helps counteract feelings of lethargy. But if you are tired and want to practice restorative poses, focus on passive backbends rather than forward bending poses, and be sure to end your sequence with a backbending position, rather than a forward bending one. Rather than doing Savasana flat on your back, try doing it with your torso supported by a bolster or stack of blankets, so your chest is open and your back is in a slight backbend. Or, maybe even reverse the typical pattern of a practice, begin your sequence with resting poses and moving slowly onto more active ones so you are left feeling a bit energized. Often I'll end a restorative sequence by standing in Mountain pose and inhaling as I raise my arms overhead into a slight backbend and exhaling as I return my arms to my sides. 

Stress. For people who are suffering from chronic stress, standing poses, Sun Salutations, backbends, and twists can be over stimulating. So try to end a sequence that is focused on any of those types of poses with any long supported inversion, such as Legs Up the Wall pose or Easy Inverted pose, or any restorative pose that you enjoy.

Even a long Savasana of 10 minutes or more, with a mental focus, such as your breath, would be helpful as an emotional counter-pose (see Savasana Variations) or any form of yoga nidra (see Audio Tracks tab above). Stressed out people tend to skip these ending poses because they think they don’t have time and that restorative poses are not “productive.” However, when you’re suffering from chronic stress, the most beneficial practice for you is some type of conscious relaxation (see The Relaxation Response and Yoga). As with anxiety, you may need to first burn off excess energy with a more active practice, but always leave time for conscious relaxation at the end of your sequence.

 I, myself, have been practicing like this for many years, with focused, nervous-system pacifying sequences during particularly challenging times, and balanced sequences with emotional counter-poses the rest of the time. But what if you, like many other people, do not practice often at home and do most of your yoga practice in classes or with videos? In this case, there is no reason why you can’t do just the counter-pose after the class or video. For example, if an evening backbend practice has left you feeling agitated or even just hyper (I can’t tell you how many people have told me that backbends at night cause insomnia), there’s no reason why you can’t just practice a supported inverted pose or conscious relaxation on your own before bed. This will help pacify your nervous system and may even lead to better sleep.

Tuesday, June 25, 2013

Tucking and Tilting the Pelvis

by Baxter

We recently received an inquiry about positioning the pelvis in yoga poses that I thought it worth addressing in a general, full-length post. Let’s start with the question:

Dear YFHA Staff,

The phrases "Tuck in and Tuck out" are very commonly used by several of my teachers. I get so confused listening to those words that these days the minute I hear anything close to "Tuck" my meditative yoga practice goes for a ride. What are the teachers referring to when they use those words? Are they alluding to the movement of sacrum? For eg: in Bridge pose and other supine poses, do you draw the sacrum in (I guess the word is Tuck in) or do you draw it out? Can't we just keep the sacrum in neutral position and still get the benefits of the supine poses?


Yes, dear reader, there is a lot of talk about “tucking” the pelvis these days in the yoga world! Although I don’t hear or use the same exact phraseology as you teachers are using, I think I have a sense of what they are going for. I might suggest the terms “tipping” and “tucking” of the pelvis, as a whole, for what is being suggested. In anatomical terms, the action can take place relative to the top of the upper leg bone, the femur bone.

When you “tip” the pelvis, this means you are rolling it forward and down over the head of the femur, in what is referred to in anatomical circles as anteversion or flexion at the hip joint. This happens to some extent in forward bending poses, like Uttanasana (Standing Forward Bend), when we roll the hips forward and down to initiate the forward bend.This movement also encourages the forward rounding of the lumbar vertebrae due to the effect of gravity, known as flexion of the lumbar spine, in the specific situation of Uttanasana. Yet we are also sometimes encouraged to extend the lower spine, as in a backbend, when entering into some forward bends. In other words, as the pelvis is rolling forward over the thighbones, we simultaneously extend the rest of the spine as in a backbend. This can be a useful suggestion in some lower back injury situations, or if you are focusing on strengthening the extensors of the back body. But it could be just as helpful in some cases, to allow the natural flexion of the lower back in Uttanasana accompany the anteversion of the pelvis.
Tipping the Pelvis (Uttanasana)
The other action, which I call “tucking” of the pelvis, is essentially the opposite action, in which the pelvis rolls backwards over the head of the femur bone.  Anatomically, this is called retroversion or extension of the pelvis. It is an essential action, at least to some extent, when we are trying to do some of our back bending poses, like Dhanurasana (Bow pose) or Urdhva Dhanurasana (Upward Bow pose), which require some length and opening at the front of the hip joint to successfully achieve these more advanced backbends. Just like with tipping, the spine may have a natural inclination that accompanies tucking, like some extension of the spine if we are trying to do Upward Bow or Wheel pose. However, if you observe someone standing in Mountain pose, and ask them to exaggerate the tuck, you will notice that the lower spine rounds back, which actually means the vertebrae are tipping forward into flexion. If you then ask the person to tip the pelvis forward, you will see that the lower spine goes into a backbend shape, bowing forward towards the navel. This indicates that the lower spine is going into some extension.
Tucking the Pelvis (Backbend)
Playing with this movement of the pelvis in Mountain pose is a good way to begin to feel these actions and the results at both the hip joint and the lower spine. You might also start to sense if one way feels more typical of how you hold your pelvis relative to you upper leg bones when standing.  If your teacher was suggesting that more tip or tuck would be better for you, see if his or her suggestion actually does what predicted. Be a little skeptical, especially if you are working with a newer teacher. There is a lot of subtlety to this pelvic alignment, and it first it will likely feel a bit strange, even if it ultimately might lead to better posture and lower back alignment. When looking at supine poses, done lying on your back, face up, you will want to do the same experimenting to see what works best for you.

And I have not even mentioned the movements that can happen between the pelvis and the sacrum, known as nutation and counternutation! Shari and I have written some about that elsewhere, so take a re-read of some of those posts (Friday Q&A: Trikonasana, Janu Sirsasana and the Sacrum and Yoga and the Sacrum if you are not familiar with these terms. Judith Lasater, in her book Yoga Body, has a discussion of what happens in regards to these two actions in forward and back bending poses. There is some controversy about how much nutation and counternutation actually take place in adults in yoga poses, but there is a lot of variability in how much “intra-pelvic” movement (between just the two pelvis bones and the sacrum bone) between individuals from my observations. It is always wise to get the opinion of an experienced teacher who can watch your body move in different poses to see where your fall in this regard.

I would also suggest that you directly ask your teacher to stop and demonstrate the actions of tucking so you can get a clearer idea of what he or she is talking about. Sometimes I find that without that clarity, I am just guessing as to what the teacher wants me to experience. And it would also be reasonable to ask why he or she feels this is important to experience. So, ask the how and the why when these sorts of instructions are creating more confusion than clarity, and rock that pelvis on.

Monday, June 24, 2013

Yoga Asanas: Endurance Training or Resistance Training?

by Ram
Thin Branches by Melina Meza
Endurance training improves functional capacity while resistance training improves muscle strength and endurance. While the anaerobic system enables muscles to recover for the next burst, aerobic system ensures that the energy demands are continuously met during the exercise regimen. Therefore, training for many sports demands that both energy-producing systems be developed. The question is: where do yoga asanas fit into the above mentioned definitions? The answer becomes very important in terms of regeneration and renewal of muscle stem cells with yoga.

After carefully researching several sites, I have come to the conclusion that yoga is both an endurance training system as well as strength training. Before talking about that in detail, let me review some of the terms:

Endurance Training:
This kind of training is what we refer to as aerobic exercise. It may involve bicycling, walking on a treadmill, swimming, rowing, cross-country skiing and other exercises that generally increase stamina and endurance. Since endurance training generally refers to training the aerobic system as opposed to anaerobic system, this type of training primarily employs the slow twitch (type 1) fibers and increases their efficiency and resistance to fatigue. Endurance in sport is closely tied to the execution of skill and technique.

Resistance/Strength Training:
Resistance training or strength training is a type of physical exercise that induces muscular contraction that helps builds the strength, anaerobic endurance, and size of skeletal muscles. Strength training is primarily an anaerobic activity, uses the fast twitch muscle system (type 2 fibers) and provides significant functional benefits and improvement in overall health and well-being, including increased muscle, tendon, ligament strength and toughness, improved joint function, increased bone density, increased metabolism, improved cardiac function, and elevated HDL (good) cholesterol. Strength training increases the force output of the muscle through incremental weight increases and also uses various forms of exercises and equipment to target specific muscle groups.

Anaerobic Exercise:
Anaerobic exercise is typically used by athletes in non-endurance sports to promote strength, speed and power, and by body builders to build muscle mass. It involves using muscle energy systems that develop differently compared to aerobic exercise and lead to greater performance in short duration, high-intensity activities, which typically last from few seconds to up to about couple of minutes. Anaerobic exercises trigger lactic acid fermentation and recruit the fast twitch muscle systems (also known as Type 2 fibers). If the intensity of the exercise exceeds the rate with which the cardiovascular system can supply muscles with oxygen, it results in buildup of lactate, making it impossible to continue the exercise. Unpleasant effects of lactate buildup initially include the burning sensation in the muscles, and may eventually include nausea and even vomiting if the exercise is continued.

Aerobic Exercise: In contrast to anaerobic exercise, aerobic exercise includes lower-intensity activities performed for longer periods of time. Aerobic means "in air” and refers to the use of oxygen to adequately meet energy demands during exercise Generally, light-to-moderate intensity activities that are sufficiently supported by aerobic metabolism can be performed for extended periods of time. Activities include, but is not limited to, walking, long, slow runs, rowing, and cycling, all of which require a great deal of oxygen to generate the energy needed for prolonged exercise. Aerobic exercises generally use slow twitch muscle fibers or Type I fibers that are slow to fatigue and suited for endurance.

Reasons why Hatha Yoga is Endurance Training


1. Breath: Endurance training is all about using the aerobic system and refers to the use of oxygen to adequately meet energy demands during exercise. Similarly, it is not yoga if you don’t breathe. Breath practice is an integral part of yoga, and it is very common for practitioners and students as well to use the back-of-throat nose breathing called ujjayi pranayam, which lengthens inhalations and increases lung capacity. This in turn delivers more oxygen to the body and helps with overall performance and efficiency. In addition, the increased flow of oxygen relieves soreness and also enhances tissue repair.

2. Endurance: Endurance training improves functional capacity and requires the use of physical and mental strength. In yoga, physical strength requires for us to cover more ground with fewer steps, develop a longer natural stride and smoother and steadier pace. To achieve this we need flexible hip flexors for greater hip flexion, well-lubricated joints, and properly stretched muscles. Holding a certain yoga pose for a long time requires discipline and commitment. This helps in not only strengthening the muscles but it also builds confidence and slows down the chattering in mind; the practice of simply holding the pose helps to overcome mental negativity and the fear of pain. It is also a common practice to incorporate several minutes of meditation either before or after a yoga asana class that helps with concentration and to develop the mental strength.

3. Core Strength: Endurance training not only increases stamina but endurance as well. Yoga asanas that focus on abdominal strengthening keep a body strong, centered, and powerful. Yoga core strengthening poses not only assist in building strong abdominal muscles but also help to strengthen and protecting the back and hips.

4. Focus:
Training in endurance sports (including, but not limited to, bicycling, swimming, rowing, and cross-country skiing) requires developing an inward, mindful state of being, and endurance training athletes are always encouraged to “stay in the moment.” Focus helps you understand and follow the energy and action of a yoga pose and also helps you develop mental fitness. Yoga practitioners thus constantly focus on their inhalation or exhalation and on every movement and nuance of a pose.

Reasons why Hatha Yoga is Resistance Training


Resistance training or strength training involves a lot of muscular contraction that helps build the strength, anaerobic endurance, and size of skeletal muscles thereby providing functional benefits in muscles, tendon, ligaments and joints. Strength training uses various forms of exercises to target specific muscle groups. Yoga uses the body’s own weight as resistance to build strength and balance thus strength gains are achieved without elaborate and expensive weight-training equipment. Yoga poses place the body in many positions that not only require strength but also require contraction of certain specific muscles (referred to as an isometric contraction) to hold the position. In addition, muscular contractions actually help more muscle fibers to be recruited, resulting in improved strength gains. While this does not result in acquiring bulky muscles, continuous muscular contraction helps to lengthen, tone and strengthen the muscles. A continuous flow sequence that calls for moving into several poses sequentially is a physically demanding practice that provides students with opportunities for continued strength gains.

Conclusion


In conclusion, yoga increases muscle strength, power and endurance through weighted exercises. By holding the body in specific poses, yoga helps to improve balance, strength and stamina. Certain postures improve circulation, digestion, balance, flexibility and agility. Keeping the body in certain postures and focusing intensely on moving through and holding each of the poses not only helps to improve strength, balance and concentration but also builds endurance. Thus, in my opinion, a consistent yoga practice is both strength and endurance training.

Watch out for the sequel article to understand how this aspect of yoga asana relates to regeneration and renewal of muscle stem cells with yoga, an important component of healthy aging.

Friday, June 21, 2013

Healthy Spirits: New Arrivals at Castro

1. Boulevard/Sierra Nevada Collaboration: Terra Incognita

2. Almanac Barrel Noir

Friday Q&A: Timing Your Yoga Poses

Q: You sometimes suggest staying in a pose for about 90 seconds. Is there a way you tell that it’s 90 seconds? Sometimes 90 seconds is a long time and sometimes it is fleeting.

I don’t want to stare at the second hand of a clock – which seems to negate many of the benefits. I set my cell phone alarm when I mediate but I don’t want to reset it every 90 seconds for this purpose - again, there goes any peace.

While I don’t want to obsess about time, I don’t want to stop at 20 seconds when I can do more. I’m not talking about working through pain or discomfort. It’s not my body as much as my mind.

I’m having difficulty articulating my question clearly; I hope it makes sense to you.


A: Fortunately, there is any easy answer to your question! If you don’t want to use a countdown timer to time your poses, you can count your breaths. This is not only simple but has the added benefit of focusing your attention on your breath, making your practice a more mindful experience.

The first thing to do is to figure out how many breaths you take per minute. Since the number of breaths you take per minute varies with the type of pose that you’re doing, you should take about three measurements. Using a timer set for one minute, count your natural breaths in:
  1. a simple seated pose
  2. a comfortable stretching pose
  3. a vigorous standing pose, such as Warrior 1
Once you’ve established a one-minute count, you can then use that number to estimate a given length of time in a certain pose. For example, if you take 16 breaths per minute in a comfortable stretching pose, 90 seconds would be about equivalent to 24 breaths. Of course, this is just approximate, but there is no need for precision in these situations. The only reason we give fixed times for holding poses (rather than numbers of breaths) is because everyone’s breathing patterns—along with their physical abilities—are so different. You may even find that your own breathing patterns change over time, but you can always re-test yourself.

When you want to increase your endurance in difficult poses, counting your breaths is a great way to time yourself. Each month, for example, you could add one more breath to your count, and over time you would quite gradually be increasing your time in the pose and building your strength.

For restorative poses, where you are going to hold the pose for several minutes, you may prefer to use a timer. But it’s completely up to you.

—Nina

Thursday, June 20, 2013

Healthy Spirits: New Arrivals at Castro


1. Ale Industries Pink Drank

2. Ale Industries Uncle Jesse


Healthy Spirits: New Arrivals CASTRO

1. Prairie Artisan Ales Prairie Bomb (limit 1 per customer)

2. Bruery Bois (limit 1 per customer)

3. Hopfenstark Station 7 Saison

4. Hopfenstark Station 16 Saison

5. Marble Brewing Decadence Russian Imperial Stout

6. Struise Pannepot

7. Struise Pannepot Reserva

Healthy Spirits: Bruery Bois and Prairie Bomb

Now Available at Castro and Clement: Prairie Artisan Ales Prairie Bomb (limit 1 per customer) and Bruery Bois (limit 1 per customer).

Soothing Yourself with Supported Forward Bends

by Nina

As I discussed yesterday in Anxiety, Yoga and the Front Body, supported forward bends can be wonderfully quieting and soothing. You can use these poses to calm yourself when you’re feeling anxious or to turn inward when you’ve been over-stimulated. However, you do need to set up for them properly. By that I mean that the poses need to be completely comfortable. If they’re not completely comfortable for you, they’re going to be irritating and maybe even aggravating, which defeats the whole purpose of practicing them.

To be comfortable in these poses, you need to:
  • Pick the seated position that is best for your body (crossed legs, straight legs or wide angle legs). Experiment and see which of the three poses described below are most effective for you.
  • Choose the propping (bolster, pillows, stack of blankets or chair) that is truly comfortable for you. Be honest with yourself about the height you need to be comfortable, rather than imitating a photograph.
Crossed-Legs Forward Bend

If your hips are more flexible than the backs of your legs, you might prefer sitting with crossed legs (Sukasana) as in the following two photos.
Unless you are super flexible, start by sitting with crossed legs on a height, such as a folded blanket, with the bolster, stack of blankets, or chair in front of you. Then, bending from your hip joints without rounding your back, slowly fold forward. When you reach the full extension of your spine, allow your back to gently round as you come down toward the prop. (If rounding irritates your lower back, do the version with the chair and keep your back straight.)

Fold your arms, with elbows out to the sides, and stack your hands on the prop. Then rest your forehead on your hands, gently tugging your forehead skin down towards your eye. Stay for two or three minutes (or longer if it's delicious), switching the cross of your legs half way through.

Straight Legs Forward Bend

If your legs are more flexible than your hips (this is somewhat atypical but some people—like me—have this body type), you might find it easier to do the pose with straight legs (Paschimottanasana), as in the next two photos.

Unless you are super flexible, start by sitting with straight legs on a height, such as a folded blanket, with the bolster, stack of blankets on top of your legs or chair over them. Then, bending from your hip joints without rounding your back, slowly fold forward. When you reach the full extension of your spine, allow your back to gently round as you come down toward the prop. (If rounding irritates your lower back, do the version with the chair and keep your back straight.)

Fold your arms, with elbows out to the sides, and stack your hands on the prop. Then rest your forehead on your hands, gently tugging your forehead skin down towards your eye. Stay for two or three minutes (or longer if it is delicious), keeping your legs lightly active.

Wide Angle Forward Bend


People who are relatively flexible in both the hips and legs often find wide angle legs (Upavistha Konasana) the most comfortable position for a forward bend, as shown in the next two photos. Unless you are super flexible, start by sitting with wide angle legs on a height, such as a folded blanket, with the bolster, stack of blankets, or chair in front of you. Then, bending from your hip joints without rounding your back, slowly fold forward. When you reach the full extension of your spine, allow your back to gently round as you come down toward the prop. (If rounding irritates your lower back, do the version with the chair and keep your back straight.)

Fold your arms, with elbows out to the sides, and stack your hands on the prop. Then rest your forehead on your hands, gently tugging your forehead skin down towards your eye. Stay for two or three minutes (or longer if it is delicious), keeping your legs lightly active.

Sequencing

Of course, there is no reason why you can’t do more than one of these poses or all three. And by doing more than one pose, you’ll increase the quieting effects. If I were to sequence them, I do them as follows:
  1. Seated Crossed Legs Forward Bend (Sukasana)
  2. Wide Angle Forward Bend (Upavistha Konasana)
  3. Straight Legs Forward Bend (Paschimottanasana)
But you can sequence these poses in any way that feels good to you. Before practicing these poses, you might like to do some Reclined Leg Stretches (see Reclined Leg Stretch Sequence) as stretching your legs and hips beforehand can make the forward bends more comfortable. And if your lower back feels irritated after the forward bends, I recommend doing Legs Up the Wall pose (Viparita Karani), with your lower back supported by a bolster (tailbone hanging just off the bolster) as a counter pose. In Viparita Karani, your lower back is in a slight backbend, which will help restore the curve to your lower back, but since the pose is overall a quieting one, it allows you to maintain the quieting effect of your practice.
Finally, some people just do not enjoy the effects of a long forward bend; they find that the poses elicit an unpleasant, heavy feeling that is kind of deadening rather than soothing. If that’s true for you, supported inverted poses (see Just In Time for the Holidays: Inverted Poses) may be better options. Remember, when working with yoga for emotional wellbeing, your own reactions to the poses should be your guide.

Wednesday, June 19, 2013

Healthy Spirits: Stone RuinTen

 
Stone RuinTen Imperial IPA is now available at both locations! No bottle limits so have at it!

Beer Club members may reserve bottles, but in the interest of getting the beer to people as fresh as possible, we will only be able to hold them through the weekend. That means if you haven't picked up your reserved bottle by the 23rd at 9PM it will go back on the shelf.

Healthy Spirits: New Arrivals at CASTRO


1. Anchor Zymaster Series No.4: Fort Ross Farmhouse Ale

2. Dogfish Head Black & Blue

3. Sierra Nevada Hoptimum

4. Deschutes Twilight Summer Ale

5. Meantime Smoked Bock

Anxiety, Yoga and the Front Body

by Nina

I’m going to be tackling the subject of anxiety in the coming weeks, and I thought that I’d start today by addressing an aspect of yoga for anxiety that is rather, well, subjective. Much of the information we have on the blog is science based, whether we’re citing scientific or medical studies, or exploring anatomy as Baxter did yesterday in Which Way Should Your Shoulder Blades Go?. However, when it comes to the yoga and the emotions, there is very little science that we can turn to for guidance. Fortunately, when working with our emotions, our own experience is key. I mean, with emotions, it’s not like, say, cancer. As Andrew Solomon wrote in his book about depression, The Noonday Demon:

"It is my absolute belief that in the field of depression, there is no such thing as a placebo. If you have cancer and try an exotic treatment and then you think you are better, you may well be wrong. If you have depression and try an exotic treatment and you think you are better, then you are better."

The same is true for anxiety. So for people who are feeling anxious, one strategy is to start taking a look at how certain yoga poses make them feel. And this might lead to the discovery that poses that are generally considered “relaxing,” such as Reclined Cobbler’s pose or Savasana, might actually be increasing your anxiety. That’s because for many people, just lying on your back, with your front body exposed, can make your feel vulnerable. Perhaps this is a primitive, instinctive reaction because we are descending from four-legged animals, and for them lying on the back means taking a submissive position and exposing their vital organs. But who really knows? All I can say is that yoga tradition tells us this reaction is common, and I’ve confirmed this theory with many yoga practitioners who suffer from anxiety. Likewise, opening the front of your body in a backbend or twist is considered stimulating and can therefore also feel agitating and increase your anxiety.
Maybe Not So Relaxing!
So my suggestion is that when you are in a state of high anxiety or are battling chronic anxiety, consider avoiding poses where you are lying on your back or are opening your chest. Definitely avoid active backbends and twists, and consider avoiding even passive, restorative backbends and twists. In general, look to forward bends for soothing and calming effects. Supported Child’s pose is a good option.
Maybe More Relaxing....
Supported seated forward bends with your head and arms resting on a bolster or, if your hamstrings are tight, the seat of a chair, are generally very soothing. But even an active forward bend practice, especially for those who are more flexible, can be quite effective for reducing anxiety.

And instead of doing Savasana, consider doing Crocodile pose. Fold a yoga blanket in a rectangle and place it cross-wise on your mat. Then lie down with your lower belly on the blanket (this reduces the over-curving of your lower back that tends to occur when you lie on your belly). Take your feet slightly apart from each other and fold your arms so your elbows are out to the sides and your forearms are parallel with the front edge of your mat with your hands stacked. Then rest your forehead on your hands, gently tugging your forehead skin down toward your nose (an action that seems to be very calming, who knows why).

If closing your eyes in any of the forward bends or prone poses causes you to brood or worry, let your eyes remain open, with a soft, diffuse gaze.

In the end, always allow your own experiences in these poses to be your guide. What if you find that forward bends and prone poses cause you to feel more anxious rather than less so? In that case, I’d say, by all means, avoid them. And what if you were to say that backbends make you feel less anxious? To that, I’d answer, go for it. Traditionally twists are considered stimulating and potentially agitating, and therefore probably not a good solution for insomnia, but I once had a student who said twists made her sleepy. Hearing her say that was a lesson for me that I keep returning to when I teach yoga for emotional wellbeing.

Tuesday, June 18, 2013

Which Way Should Your Shoulder Blades Go?

by Baxter

Let’s talk about the shoulder blades today. Recently, while evaluating my newest batch of teacher trainees during their teaching intensive, I was surprised to hear the instructions to “move the shoulder blades toward the pelvis” when the arms were in the overhead position, such as in Urdhva Hastasana. I heard it in Warrior 1, in Utkatasana, in Downward-Facing Dog, and virtually anytime my young wards had the arms overhead. And I flinched each time they uttered it, which just about every one of them did for the four classes they taught. Without naming names, I should mention “always move your shoulder blades down your back” is an instruction that I have heard on many occasions from very experienced teachers. These trainees did not hear me utter such words, but I realized that some of their instructors were still using this outdated understanding. This is too simplistic, as it is not what actually needs to happen for healthy movement of the arms overhead and it can actually restrict the mobility of the shoulder joint for most students.

If you look at photos of Mr. Iyengar in the classic “Light on Yoga,” you can see that he is not doing that. His shoulder blades are clearly moving towards his arms, not away from them. (I refer you to the following plates: 12, 23, 42, 91 and 96.) So what is going on here, or more accurately, what is going on with the shoulder blades when the arms go overhead?

When your arms are hanging at your sides, your shoulder blades have several common ways they move: sliding upwards is called elevation, such as when you shrug your shoulders; sliding slightly downwards, called depression, like when you tug the bottom of a shirt downwards; sliding them apart or side ways, called protraction or abduction, like when you give yourself a hug; and squeezing them together called retraction or adduction, like when doing the Cobra with a doorknob.
Shoulder Blade in Neutral (Mountain Pose)
In these four basic movements, the shoulder blades don’t rotate much. Instead, they slide around in the general way they sit on your back upper rib cage. But in addition to those movements, there are two more movements that require a bit more imagination on your part, since we can’t quite see what is going on under the skin and muscles. The first happens when you take your arms overhead, whether forward and up or out the sides and up. It is called upward rotation of the scapula.  There is usually a bit of elevation of the entire shoulder blade from its neutral position, like in Mountain Pose, and a bit of protraction. But more noticeable is the out and up swing of the shoulder blade that allows for the greatest reach of the arms overhead.
Rotating Shoulder Blade
The opposite action is required to get the arms back down to your sides, and is called downward rotation. It is likely that a bit of depression of the shoulder blade and retraction also accompanies this action.

My teacher Donald Moyer refers to the rotational movement of the shoulder blades as “traffic circles.” Depending on which way the arms are moving or how they are positioned on the body, the traffic around the outer edges of the circle will flow in one direction the other. As an example of how you might imagine this, you might start with your awareness at the lower tip of your right shoulder blade. You can likely reach around and feel this with your fingers of your left hand. When your arm goes overhead, the traffic flows up the outer edge, across the top edge from right to left, and down the inner edge back to the lower tip of the shoulder blade. You might have to imagine there is a central pivot point in the shoulder blade, and the traffic causes the shoulder blade to rotate around that point. Then the traffic flows in the opposite direction as the arm comes down to Mountain pose position.

You might be asking yourself if there are times when saying “move the shoulder blades down the back” would be appropriate? And the answer is yes. For instance, with new students who have hunched shoulder blades that are semi-permanently elevated and forward rounded, you might have to ask, show and encourage them to depress the shoulder blades in Mountain pose.  I will keep a slight feeling of downward movement even as the arms approach the 90 degree mark, such as in Warrior 2 pose. In Warrior 2, there is a bit of upward rotation of the blades, but mostly protraction or widening away from the spine. The downward movement is helpful for those with the tendency to hike the shoulders in these lower arm positions.

But so what if you draw your shoulder blades down the back when they are overhead? What’s the big problem? Well, as your arms and shoulder blades swing up, the upper arm bone, the humerus, rolls slightly outwards, so as to have a better contact with the shoulder blade. If you then pull the “shoulder blades towards the pelvis”, the shoulder blades start to downwardly rotate, the arm bone pulls down with it, and the shoulder joint gets narrowed and pinched, meaning that the soft, non-bone structures can get pinched in an unhealthy way. I dislike demonstrating this “wrong” way of doing it for my students, because it quite literally pinches my gleno-humeral joint.

Having a clearer understanding of how the shoulder blades change positions on the rib cage will be very helpful to you as you try some of the shoulder openers we share with you because so many of them work more effectively if you encourage the upward rotation, protraction and elevation of the scapulae I have shared with you here today (see Featured Sequence: Opening Tight Shoulders and future posts about the individual poses). 

Monday, June 17, 2013

Depression, Anxiety, Peace

Grasses in the Forest by Melina Meza
"If you are depressed you are living in the past. If you are anxious you are living in the future. If you are at peace you are living in the present." —Lao Tzu

Friday, June 14, 2013

Friday Q&A: Trikonasana, Janu Sirsasana, and Your Sacroiliac Joints

Q: I'd like to know more about Janu Sirsasana and Trikonasana and the sacroiliac joint. Is there a post you can point me too? thanks!

SI Joints for Female and Male (look for the red lines!)
A: It turns out that we did a few posts last year on the SI joint and the challenges it presents. You can take a look at a post Nina and I wrote on Friday, Dec 7th 2012, as well as two posts that Shari wrote on Dec. 19th and Dec. 20, 2012. Those will give you some good information about the sacrum and the SI joint to start with.

Regarding Janu Sirsasana and Trikonasana, I find that if you have a problematic SI joint, these two poses can both be particularly challenging. In both cases, I try to keep a sense of evenness in the movement of the entire pelvis and sacrum as I go into, maintain, and exit from these two poses.  Each pose has the potential to create a torque-ing action in the pelvis, which could then destabilize a loose SI joint on one side. So, especially as you enter the poses, move slowly enough that you can feel and listen for any sudden twists of the bones, or more likely, any changes in sensation over one SI joint. Often times, this leads to a variation of the two poses that is not quite as deep as previously practiced, but one that feels really safe and pain-free in the SI area of the back pelvis. Because there is so much personal variation in our skeleton and soft tissue structures, it is challenging to be more specific than that, and it is very helpful to have a set of experienced eyes observe you in these poses if they are challenging for you now. But I have one recommendation for each pose that can be helpful in minimizing torque.

In Trikonasana, before tipping your pelvis and torso sideways over your front leg, create a sense of your entire pelvis lifting off of your leg bones. Then, as if your pelvis had a flagpole coming up through its center, rotate your pelvis toward the front leg a bit. For example, if your front leg is the right leg, you would rotate your front left hip point towards your inner right thigh. Keep the lightness of your entire pelvis and that rotation as you tip your pelvis over your front thigh. Beyond the stretch of the inner right thigh that we often feel as we enter into the pose, keep more attention on the quality of sensation at the SI joints. And don’t let your torso bow over your front leg, as this tends to overstretch the left SI and compress the right SI.

For Janu Sirsasana, I find that modifying the direction of bend of the pelvis and torso helps to relieve some of the torque on the pelvis.  Instead of turning your chest to line up with your straight leg, try keeping in line with the direction of your pelvis, which is usually somewhere between your two knees. Tip forward slowly in that direction. You will still need to be very attuned to the sensations in your SI joints, as your straight leg hamstring is going to stop the forward tip of your pelvis before your bent leg side does. It is at this moment that the torque is likely to take place. So as soon as you feel a bit of stretch in your straight leg hamstrings, stop there and wait a bit to see how things feel. You may be up a lot higher than usual, but your sacrum will thank you for it later!

—Baxter

Because these are the two most risky poses for your SI joint, if you are currently suffering from an SI injury (I've been through this), I recommend taking a break from them entirely until the pain in your joint clears up. When your joint stops hurting in your everyday life, you can return to doing these two poses using Baxter’s instructions. If you’re in a class and don’t want to sit around doing nothing while the others practice these poses, let your teacher know you’ll be doing alternative poses or severely restricted versions. For example, you can sit in the Janu Sirsasana position without bending forward at all, making sure to keep the curve in your lower back, or maybe do Paschimottanasana instead. For Trikonasana, you could do a severely modified version of the pose, perhaps with your bottom hand on a chair seat or on two blocks stacked end on end, you could rest by standing in Mountain pose or practicing Uttananasa (Standing Forward Bend).

—Nina

Thursday, June 13, 2013

Making Your Own Yoga Props

by Nina

In the coming weeks, I’ll be sharing my favorite supported inverted and calming poses with you. All of these poses require props of one sort or another. Now I know some people are reluctant to get started with props because they seem like such a hassle and maybe also because they’re seen as part of the whole distasteful “consumerist” aspect of yoga in America. But I’m afraid that for stress management, calming and restorative poses, props really are necessary. That’s because your body can relax much more effectively if it is being fully supported, rather than you having to use your muscles to support you.

However, using “props” doesn’t mean you need to run out and buy hundreds of dollars worth of specialized merchandise to duplicate what they have in your local yoga studio. In fact, for almost every prop we use in our poses, there is something in your house that you can use in its place.
Rolled Blankets, Folded Towels, Folded Blankets
Stacked Books, Tennis Balls, Silk Scarf, and
Bathrobe Sash
Blocks. In most cases, you can use a book or a stack of books in place of a block. The only time you need to be careful about this is when you are placing both hands on a height (for example, in Downward-Facing Dog pose with hands on blocks). In this case, make sure the books are exactly the same height. And, of course, if you’re handy, there is no reason why you can’t make your own blocks out of pieces of wood you happen to have out in your garage. Just be sure to sand them well so you don’t get any splinters.

Straps. For a yoga strap substitute, look no further than your closet. Depending on which pose you’re doing, you can use an actual belt (leather or cloth). The sash from a bathrobe works quite well. You could even use an actual tie. And, yes, it’s nice to have one of those yoga strap buckles when you want to make a loop, but you could always tie a knot in the belt for the same effect. Just make sure that the cloth isn’t stretchy, as it won’t provide the necessary support if there is a lot of give to it.

Bolsters. I’d say if there’s one prop it’s worth investing in, a round bolster is my pick! Mine has lasted over 10 years, and has provided me with so much use and comfort.... That being said, you can “fake” a bolster by rolling a couple of blankets into a firm roll. Start with one single blanket that is folded into quarters. Then, from the narrow side, roll the blanket into a tight, firm roll. Then fold your second blanket into quarters. Finally, place the rolled-up first blanket on top of the flat second blanket, lining up the edges of both at narrow end, and then roll the second blanket around the first. Pretty close to a bolster, right? Another possibility is to use a sleeping bag that has been rolled up inside its bag for storage.

In many poses, the bolster doesn’t even need to be a round shape. In this case, you can fold some yoga blankets into long, thin rectangles and stack them on top of each other. This works well for reclined, supported poses, such as Reclined Cobbler’s pose, Reclined Hero pose, and Supported Savasana.

Blankets. The blankets used in yoga studios (and in our photographs) are wool, single-bed blankets, often from an Army Navy store. Because few people use real blankets any more, it’s a bit hard to find a substitute blanket in the house. The comforters and duvets we now use on our beds—when did that trend take over?—are too fluffy to provide any real support. However, when push comes to shove, a stack of towels can do the trick. Because towels are thinner than wool blankets, you’ll have to use more to achieve the same height. But some yoga studios, including some in India, use those very thin cotton hospital blankets, and you have to use quite a number of those, too. (I actually once taught yoga at a hospital, and we used those hospital blankets there, so I know. I’ve also done yoga in hotel rooms where I used the towels, so I know all about that, too.)

Yoga Mats. If you’re practicing on a wooden or carpeted floor, you might not even need a yoga mat at all for your standing poses. Try it and see. If you are resting your head on the floor, such as in an inverted pose, and the floor is too hard, you can put a thin towel under your head. You can also use a towel for cushioning your knees or any other part of your body.

Eye Pillows.
An eye pillow has two functions. The first is to block out the light. For this purpose, you can drape a silk scarf or any other soft fabric over your eyes. The second purpose is to add a little weight to your eyelids, which can enhance relaxation. To add a little weight, you could wrap the silk scarf around a folded washcloth or even a small baggie filled with rice (hey, I just thought of that one).

Sandbags. So far, we haven’t been discussing and/or showing sandbags, but just so you know, a bag of rice or beans works just as well when you want to place a 1 or 5 pound weight on your body.

Be creative! Sometimes you can use various pieces of furniture in your house or hotel room, such as benches, ottomans, and coffee tables for various poses. I used to teach yoga in a room that had couches in it but no chairs, and at the end of class we used to do “Legs on a Couch pose,” which was my way of doing Easy Inverted pose. Baxter even uses a can of beans and rubber bands as props (see Friday Q&A: Bunions, a Can, and a Rubber Band). And we know teachers who use tennis and lacrosse balls for all kinds of evil—I mean, excellent—things.

That’s it for now, but if I’ve forgotten about anything important or you have some good ideas of your own, please let me know.

Healthy Spirits: New Arrivals at CASTRO

New stuff at CASTRO:

1. Fantome Extra Sour Black Ale (limit 1 per customer)

2. Jolly Pumpkin IO Red Saison

3. Upright Brewing Pure Wit

4. Fantome Printemps

5. Hanssens Kriek 375ml+750ml

6. Mikkeller Ah Hvad Belgian Pale

7. Mikkeller Black Stout

8. To/Ol Fuck Art This is Architecture

9. Ritterguts Gose

Healthy Spirits CASTRO and CLEMENT: Fantome Extra Sour Black Ale 2013

New at Castro and Clement: Fant ome Extra Sour Black Ale-Batch 2/2013. Limit 1 per customer. $29.99/750ml. Beer club members may reserve by calling 415-255-0610 for CASTRO or 415-682-4260 for CLEMENT. No reservations through e-mail or facebook, please.

Healthy Spirits: Exclusive Anderson Valley Beer

Just got word that our exclusive barrel aged beer from Anderson Valley has gotten label approval and should be available for purchase soon! I'll get back to you all with more details when I have the specific info, but suffice it to say you should be getting excited.

Wednesday, June 12, 2013

Understanding the Relationship Between Yoga and Ayurveda

Reflections by Melina Meza
by Ram

A lot of questions/comments are being raised in this blog regarding Ayurveda and yoga, so Nina asked me to address these issues. While I think that the science of Ayurveda and yoga is better addressed and understood in a verbal format—akin to a didactic exchange of information—through this article I will try to lay out the main principles that govern both these sciences.

Thanks to Swami Vivekananda, yoga came to the West in 1893 and was welcomed by a very receptive audience. While people embraced yoga, its counterpart Ayurveda, was left behind in India. This despite the fact that both yoga and Ayurveda are two very similar paths sharing a close relationship, so closely related that they are often described as two sides of the same coin. Both these sciences, which have their origin in the Vedic texts, address health and health practices. If Ayurveda is the healing aspect, yoga is the spiritual/practical side of the Vedic teachings. Together they emphasize a complete approach to the wellbeing of the body, the mind, and the spirit. In fact, their close relationship has even led to some scholars arguing that Patanjali, considered by many to be the father of yoga, and Charaka, often considered as the father of Ayurveda, may have in fact been one and the same person known in Vedic India by different names during his travels to spread the teachings of these ancient sciences.

Both sciences have common underlying principles: the well being of an individual at the level of body and mind and the aim of helping an individual re-connect to their true nature through direct and personal experience (pratyeksha in Sanskrit). While yoga prepares the body and mind of the individual for eventual liberation and enlightenment, Ayurveda describes the various ways to keep the body and mind healthy. Both sciences emphasize our close relationship with the environment and how to alter our environment in such a way that it is harmonious with our deepest nature.

In today’s world, yoga is often thought of as “asanas only,” something like a stretching tool to keep the body limber and agile. People are drawn to yoga as a way to keep fit even though the idea behind the physical practice of yoga is to help the mind to become clear or pure and develop deeper mind-body awareness. A clear mind is not affected by stress and a clear mind produces a healthy body thus creating a greater connection with one's own pure, essential nature. Similarly, Ayurveda brings with it the knowledge of how to keep the physical body healthy and how this relates to one's spiritual journey. It addresses our entire lifestyle, including exercise and yoga. However, Ayurveda is highly individualistic and sees each individual as unique and an individual's path toward perfect health as a unique path. Hence, what is right for each individual is unique to that individual alone. This could be described as person’s unique genetic background or constitution or dosha in Sanskrit. An individual’s constitution describes who the person is at the most fundamental level.

The above concept is remarkable because as a result of this understanding, Ayurveda prescribes a unique, “tailor-made” program to each individual based upon his/her constitution and the nature of the imbalance, and avoids the “one size-fits all” concept that is followed in many systems of healing. As Dr Marc Halpern, director of the California College of Ayurveda, points out:

While Ayurveda does not agree with the "Fits all" concept, it subscribes to the philosophy that “nothing is right for everyone and everything is right for someone.”

Thus, Ayurveda is based upon understanding individualized needs and what is right only for the individual - not the masses - and fulfilling those needs to bring complete harmony.

As with diet, herbs, colors, aromas, etc, Ayurveda sheds light on which specific yoga asanas are best for each individual based on his/her constitution. With the knowledge of Ayurveda, a practitioner of hatha yoga can refine his/her practice so that it is in harmony with their internal balance of energy. Some yoga postures are best for one person while others can cause greater imbalance. By knowing one's constitutional balance, an individual can use constitution-specific asanas to reverse their imbalances and improve their health and wellbeing. Indeed, if we can understand our constitution, we can control our choices and choose only those that will lead us toward optimal health.

How does one get to know their inherent constitution? There are several alternative health journals or web sites that analyze your constitution based on your answers to a specific set of questions. Chances are that your alternative health practitioner (who does not hold a proper certification in Ayurveda studies) may have made a passing remark about your constitution. Do not rely solely on this analysis, instead take it all with a grain of salt. Before jumping to any conclusion about your constitution and changing your diet, asanas or lifestyle, it is always best to consult with an Ayurvedic health professional who will help to determine your constitution, help you to understand the nature of any imbalance, and establish a plan to bring you to balance thus providing guidance toward success in establishing a disease-free lifestyle.

Despite my opposition to separating these two sciences, let me emphasize that when it comes to the Yoga for Healthy Aging blog, we have a general policy against writing about anything except yoga and the science of aging. Not all the staff of Yoga for Healthy Aging are trained in the area of Ayurevdic sciences and we would like to keep this subject off limits. So we’re going to have to decline to address questions on specific diet, herbs, or general Ayurvedic medical advice as it is a highly individualized system. Besides we cannot provide Ayurvedic advice without examining you in person in a private setting and this, after all, is a yoga blog! So, we hope you understand.

Namaste.
 

Sample text

Sample Text

Sample Text